Make Kiki and Jiji from Kiki’s Delivery Service
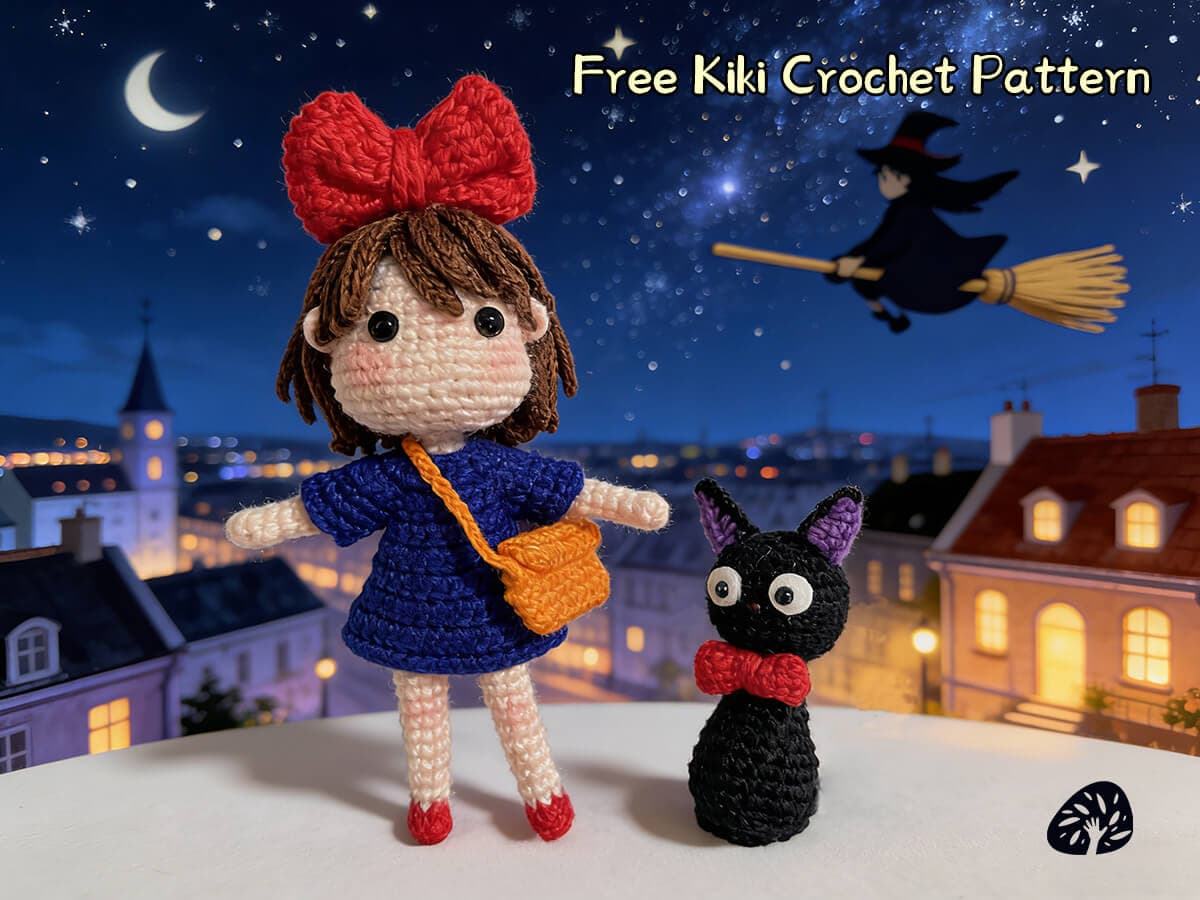
Free Kiki Crochet Pattern is your go-to step-by-step guide for creating the beloved Kiki and her black cat Jiji from Hayao Miyazaki’s classic Studio Ghibli film Kiki’s Delivery Service—and it’s 100% free! Designed for crochet beginners and Studio Ghibli fans alike, this easy amigurumi tutorial uses simple basic stitches, clear row-by-row instructions, and minimal supplies to help you craft your own adorable Kiki and Jiji plushies. No advanced crochet skills required—just a hook, yarn, and a little magic to bring Kiki’s whimsical world to life with your own hands!
Crochet Stitch Key & Basic Rules (Beginner-Friendly)
Before starting your Free Kiki Crochet Pattern, review our simple stitch abbreviations and basic project rules—these apply to all pieces of Kiki’s amigurumi and are standardized for universal crochet understanding, perfect for new crafters:
X: sc(single crochet) V: 2 sc into the same stitch A: single crochet decrease number+(): the number of times to loop the stitches in parentheses T: hdc (half double crochet) F: dc (double crochet) FV: 2dc into the same stitch blo: Through back loops only flo: Through front loops only M: 3sc (single crochet 3 together) W: 3sc into the same stitch ss,sl,st: ship stitch E: treble crochet K:skip
Basic Crochet Rules for This Project
At the end of each round, work a slip stitch (sl st) to close—this stitch also does not count toward the total stitch count.
At the beginning of each round, make a chain (ch)—this stitch does not count toward the total stitch count.
Tools & Materials
Crochet Hook Size: 0.7 mm
Yarn: Size 8 Cotton Lace Yarn
Eye Accessories: 3mm
Step 1: Crochet Kiki’s Head
Row | Stitch | Total stitch |
R1 | Magic Ring 6X | 6 |
R2 | 6V | 12 |
R3 | 6 (X, V) | 18 |
R4 | 6 (X, V, X) | 24 |
R5 | 6 (3X, V) | 30 |
R6 | 30X | 30 |
R7 | 6 (2X, V, 2X) | 36 |
R8~R12 | 36X | 36 |
R13 | 9X, 3 (V, 2X), 3 (2X, V), 9X | 42 |
R14 | 42X | 42 |
R15 | 6 (5X, A) | 36 |
R16 | 6 (2X, A, 2X) | 30 |
R17 | 6 (3X, A) | 24 |
R18 | 6 (X, A, X) | 18 |
R19 | 6 (X, A) | 12 |
R20 | blo:12X | 12 |
R21~R22 | 12X | 12 |
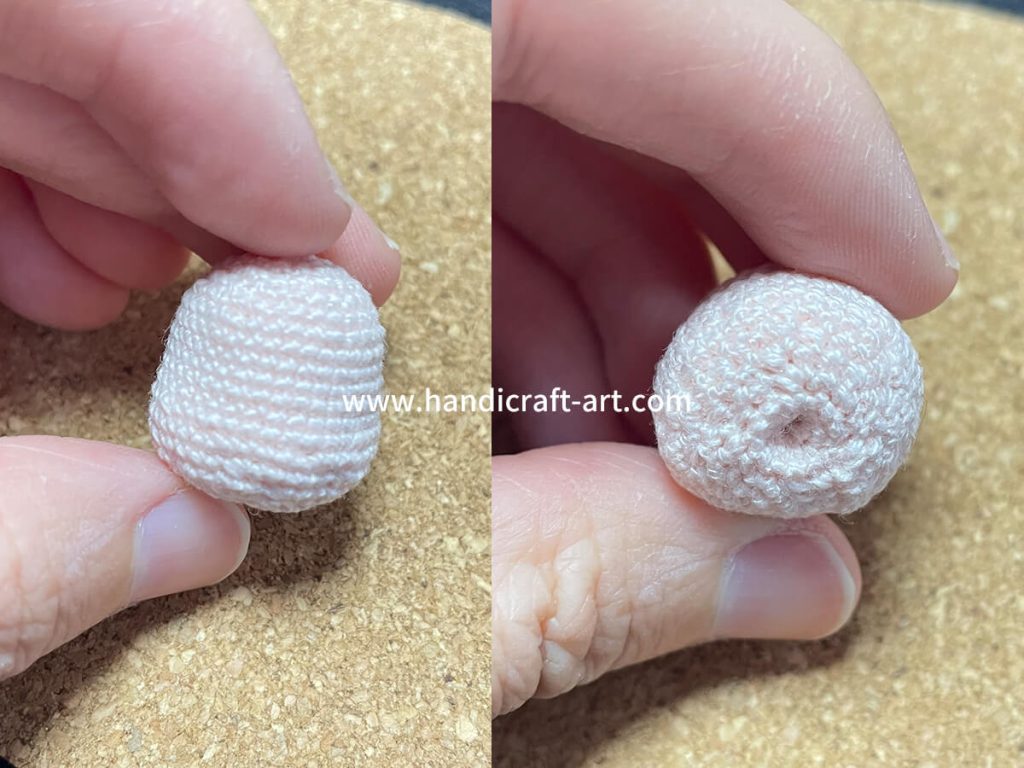
Step 2: Crochet Kiki’s Ears (Make 2)
Magic Ring 5X,do not close the round. |
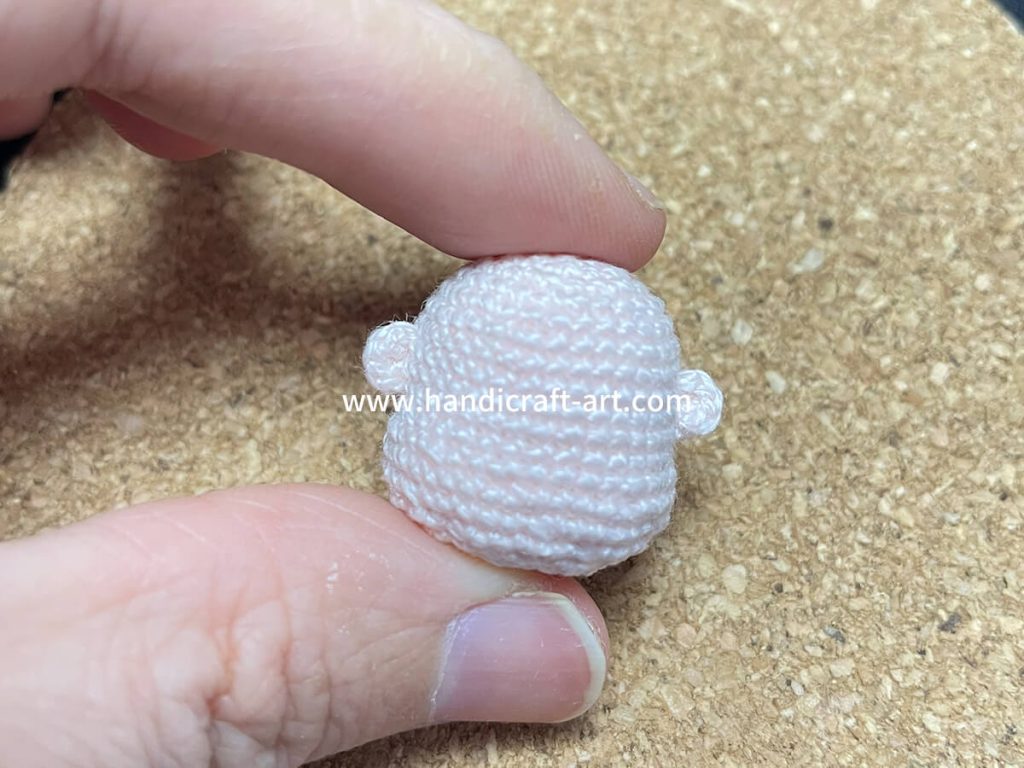
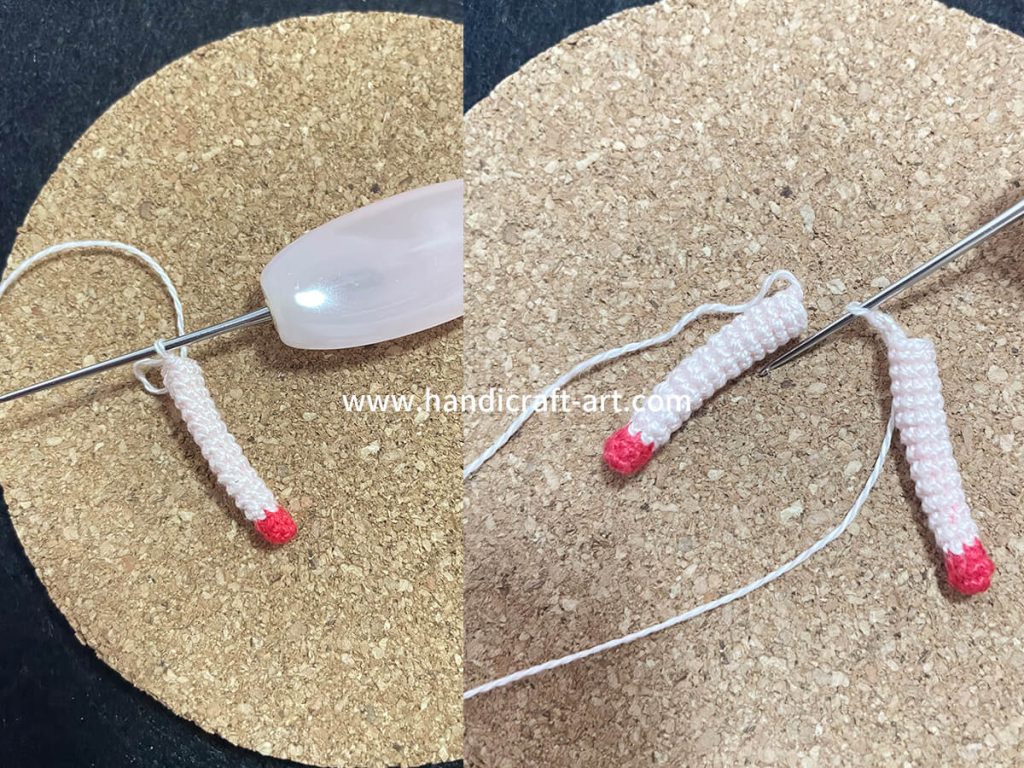
Step 3: Crochet Kiki’s Arms (Make 2)
Row | Stitch | Total stitch |
R1~R11 | Magic Ring 6X | 6 |
Step 4: Crochet Kiki’s Legs & Body (Attached)
Row | Stitch | Total stitch |
R1~R2 | Red yarn | 6 |
R3 | Change to skin-color yarn | 6 |
R4~R5 | 6X | 6 |
R6 | 5X, V | 7 |
R7~R9 | 7X | 7 |
R10 | 6X, V | 8 |
R11~R15 | 8X | 8 |
Make 2 legs. | ||
R16 | 8X, 3X (Place for the 3ch),8X, 3X (Place for the 3ch) | 22 |
R17 | 22X | 22 |
R18 | 20X | 20 |
R19 | 20X | 20 |
R20 | 18X | 18 |
R21 | 16X, A | 17 |
R22 | 15X, A | 16 |
R23~R24 | 16X | 16 |
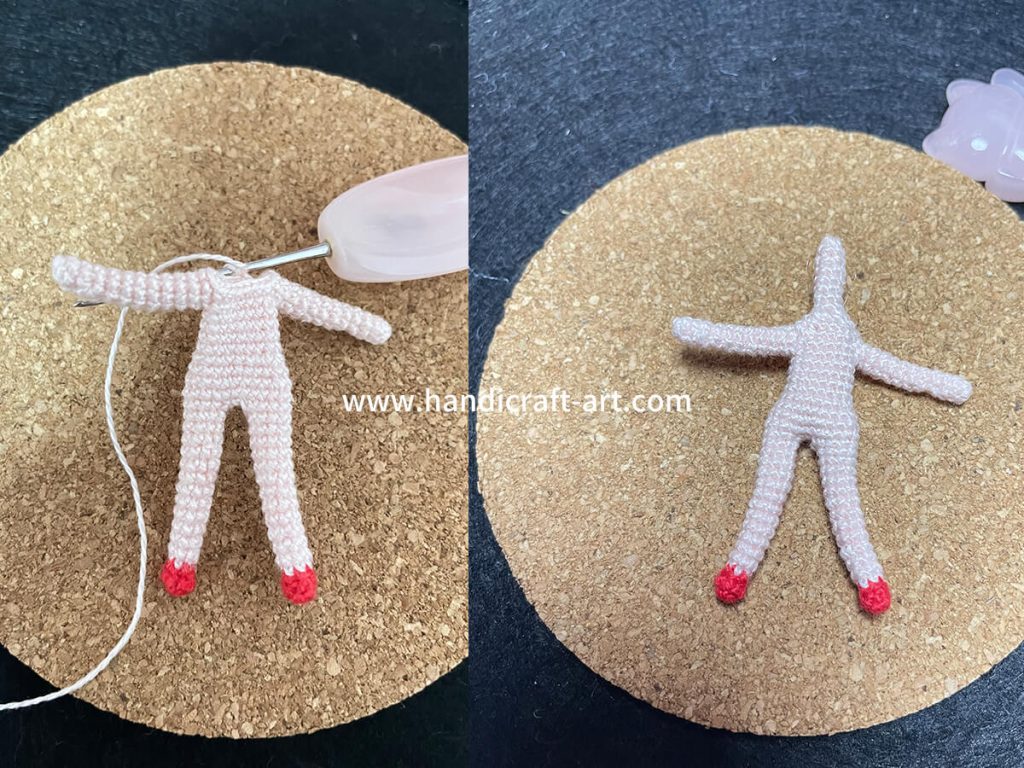
Attach the arms. Adjust the position as needed. | ||
R25 | 2X, 2X(Work into 2 stitches on the arm.), 7X, 2X(Work into 2 stitches on the other arm.), 3X | 16 |
R26 | 2X, 4X(Work into 4 stitches on the arm.), 7X, 4X(Work into 4 stitches on the other arm.), 3X | 20 |
R27 | 4 (X, A, 2X) | 16 |
R28 | 4 (X, A, X) | 12 |
R29 | 6A | 6 |
R30~R37 | 6X | 6 |
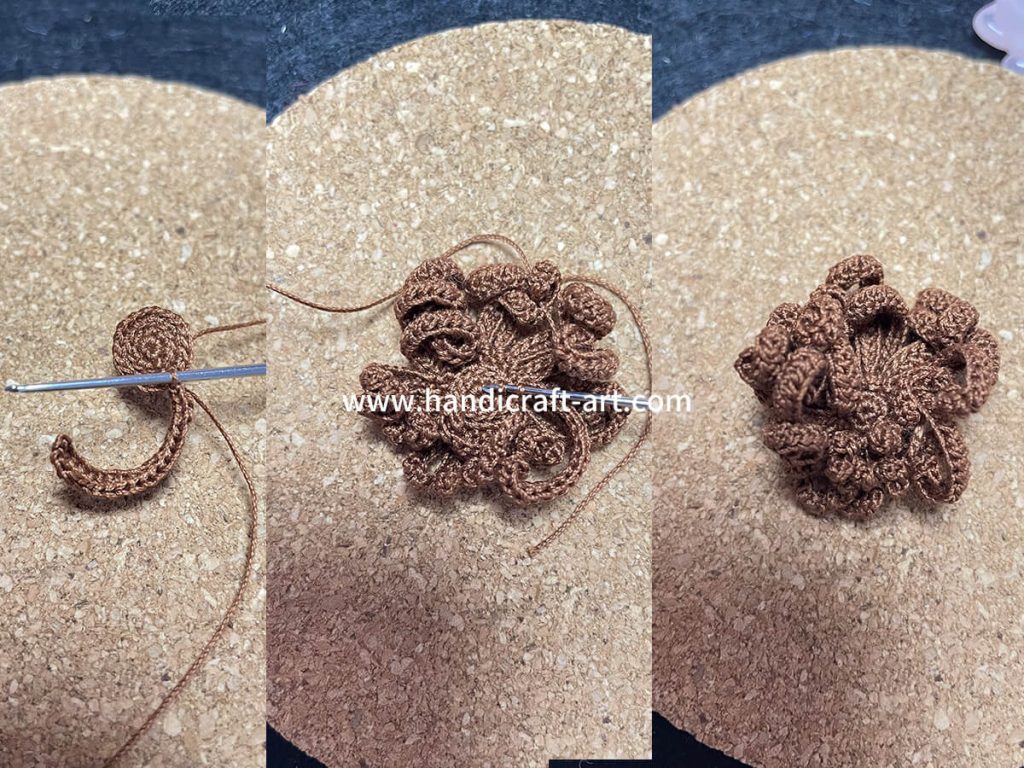
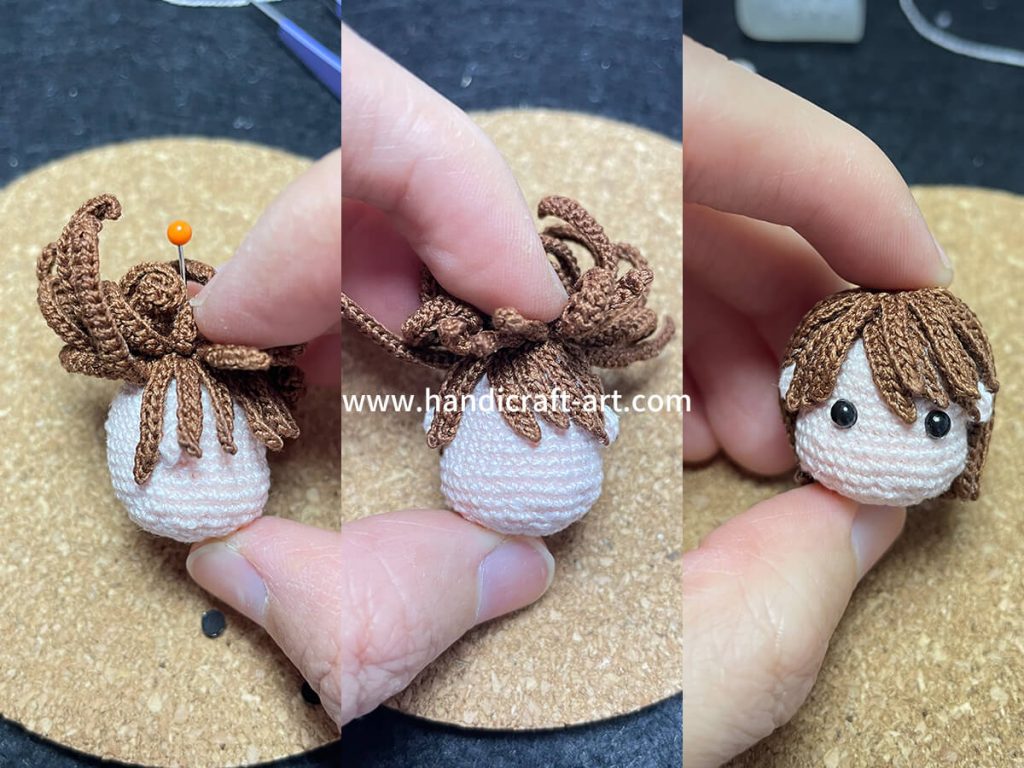
Step 5: Crochet Kiki’s Hair
Row | Stitch | Total stitch |
R1 | Magic Ring 6X | 6 |
R2 | 6V | 12 |
R3 | blo: 6 (X, V) | 18 |
First Layer of Hair (Work on R3 stitches) | ||
Stitches 1 to 10 | Make 21ch, | 20 |
Stitch 11 | Make 12ch, | 11 |
Stitch 12 | Make 11ch, | 10 |
Stitches 13 to 14 | Make 10ch, | 9 |
Stitch 15 | Make 9ch, | 8 |
Stitch 16 | Make 10ch, | 9 |
Stitch 17 | Make 11ch, | 10 |
Stitch 18 | Make 12ch, | 11 |
Second Layer of Hair (Work in blo of R3) | Work in the back loops only of R3. | |
Stitches 1 to 7 | Make 21ch, | 20 |
Stitch 8 | Make 12ch, | 11 |
Stitch 9 | Make 11ch, | 10 |
Stitch 10 | Make 10ch, | |
Stitch 11 | Make 12ch, | 11 |
Stitch 12 | Make 21ch, | 20 |
Step 6: Crochet Kiki’s Skirt
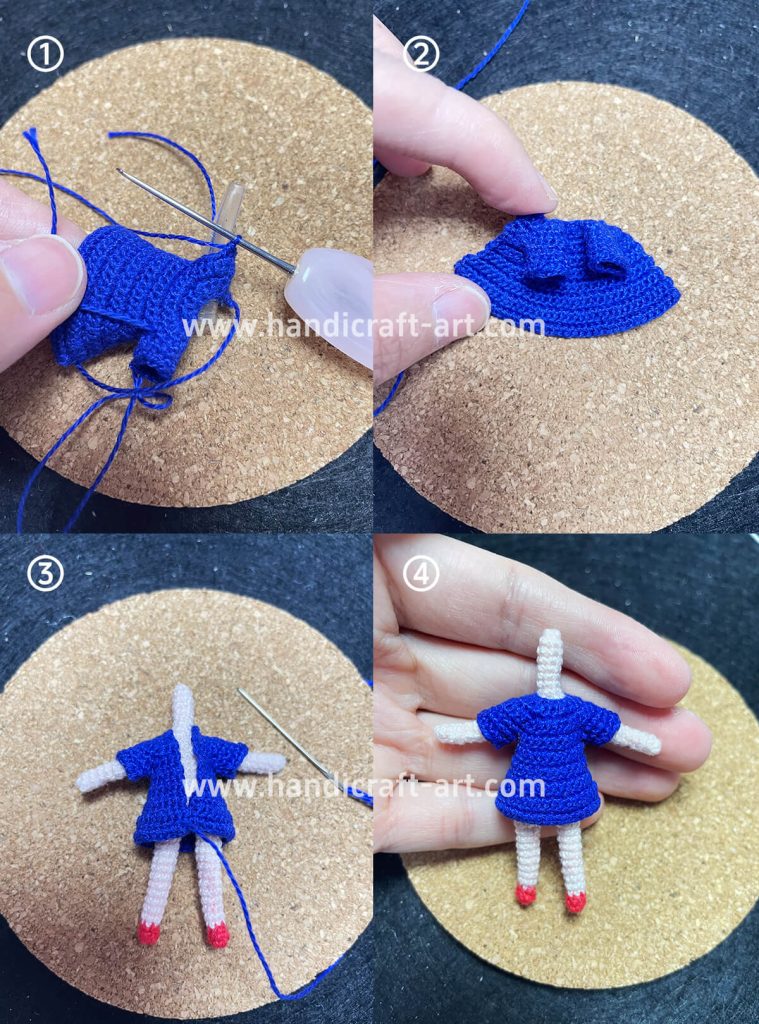
Row | Stitch | Total stitch |
R1 | Make 13ch, | 18 |
R2 | 6 (X, V, X) | 24 |
R3 | 3 (3X, V), 3 (V, 3X) | 30 |
R4 | 6 (2X, V, 2X) | 36 |
R5 | 4X, 1ch, K9, 10X, 1ch,K9, 4x | 20 |
R6 | 20X | 20 |
R7 | 4 (2X, V, 2X) | 24 |
R8~R10 | 24X | 24 |
R11 | 6 (3X, V) | 30 |
R12 | 30X | 30 |
R13 | 6 (2X, V, 2X) | 36 |
R14 | 36X | 36 |
Crochet the sleeves | Crochet the sleeve into the space of Row 5, stitch 6. Insert hook into the 1 ch. | |
R1 | 10X | 10 |
R2 | 2 (2X, V, 2X) | 12 |
R3 | 2 (5X, V) | 14 |
Sew the back together and fasten off. |
Step 7: Crochet Kiki’s Bow (Accent Color)
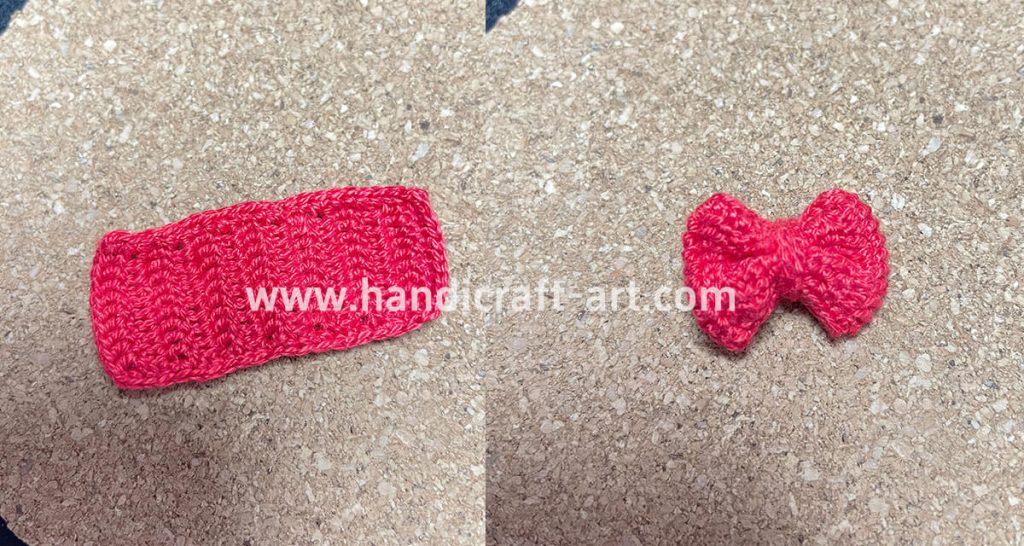
10ch → 2nd ch from hook: 9sc → Rep until desired length |
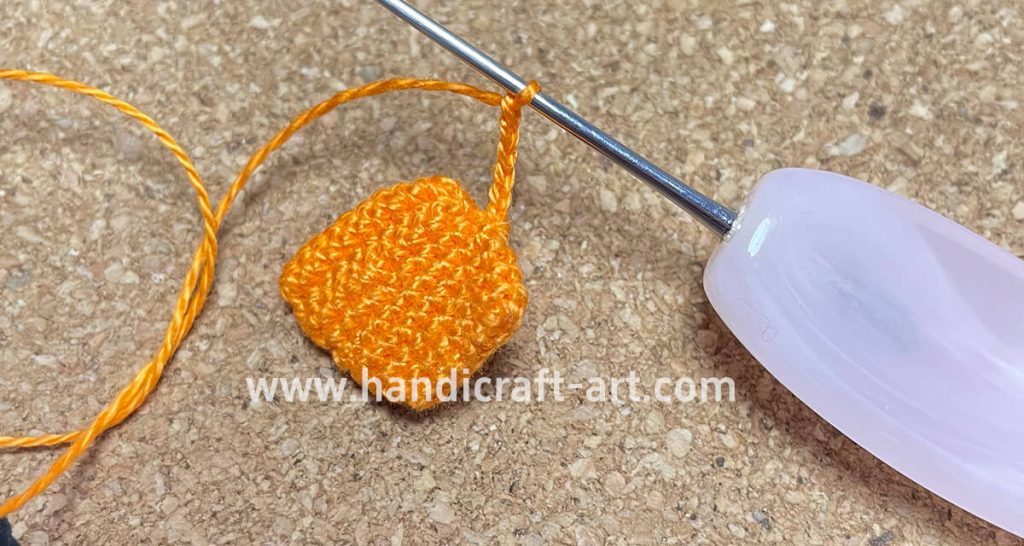
Step 8: Crochet Kiki’s Mini Backpack (Iconic Accessory)
Row | Stitch |
R1 | 8ch, |
R2~R4 | 16X |
R5 | 7X,Flip |
R6~R8 | Flat crochet 7X |
Work the strap on one side, and once it reaches your desired length, join it to the other side. |
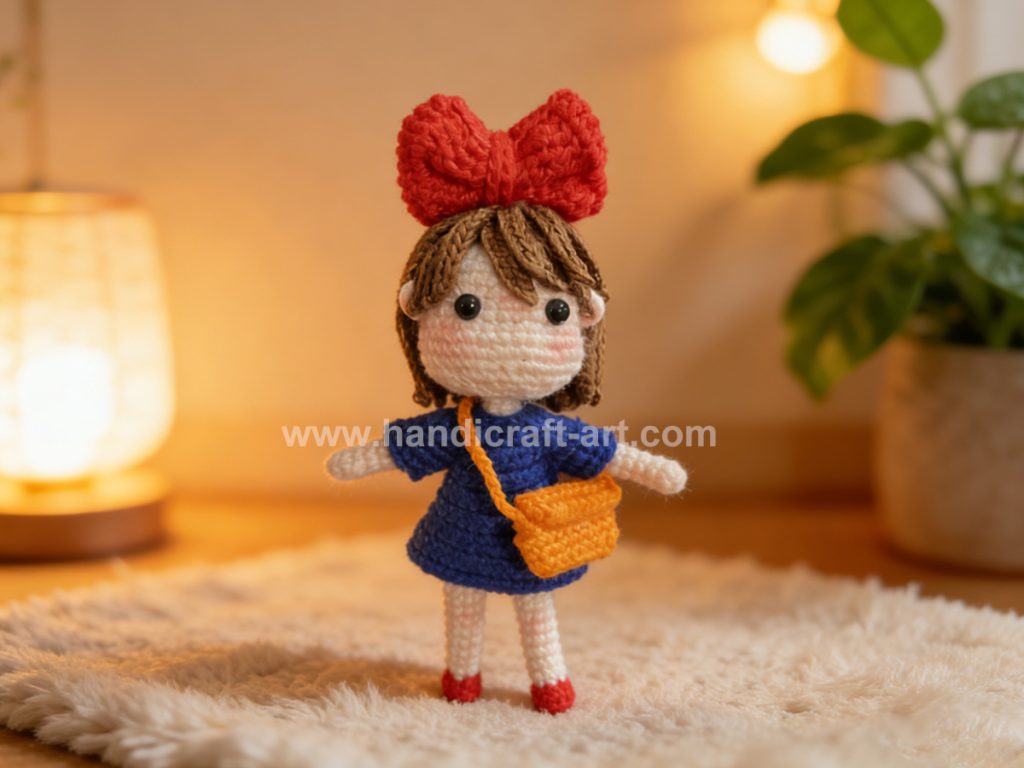
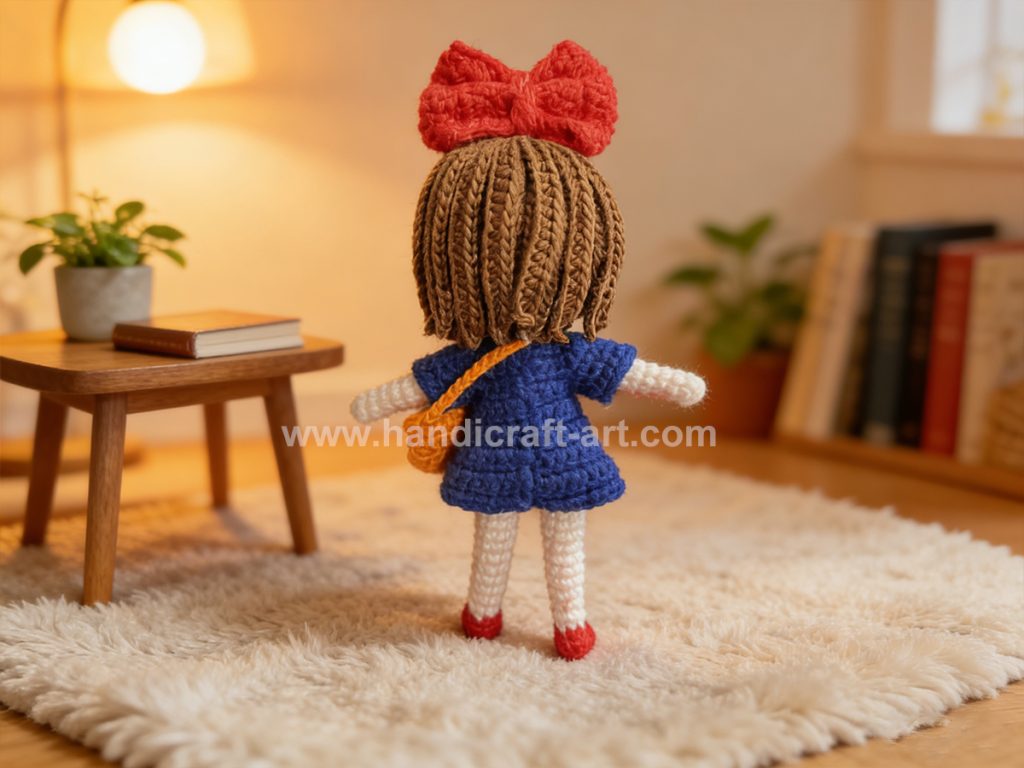
The finished Kiki from Kiki's Delivery Service
Next Steps: Part 2 of the Free Jiji Crochet Pattern
This Free Kiki Crochet Pattern (Part 1) covers all of Kiki’s amigurumi pieces—and Part 2 will focus on Jiji the black cat (Kiki’s loyal sidekick!) with the same easy, step-by-step instructions for beginners.
Stay tuned for Part 2 of our Studio Ghibli amigurumi tutorial—we’ll walk you through every step to make Jiji and complete your Kiki’s Delivery Service amigurumi set!
#FreeKikiCrochetPattern
#StudioGhibliAmigurumi
#KikisDeliveryServiceCrochet
#EasyAmigurumiPattern
#BeginnerCrochet
#FreeCrochetPattern
#JijiCrochet#StudioGhibliCrafts