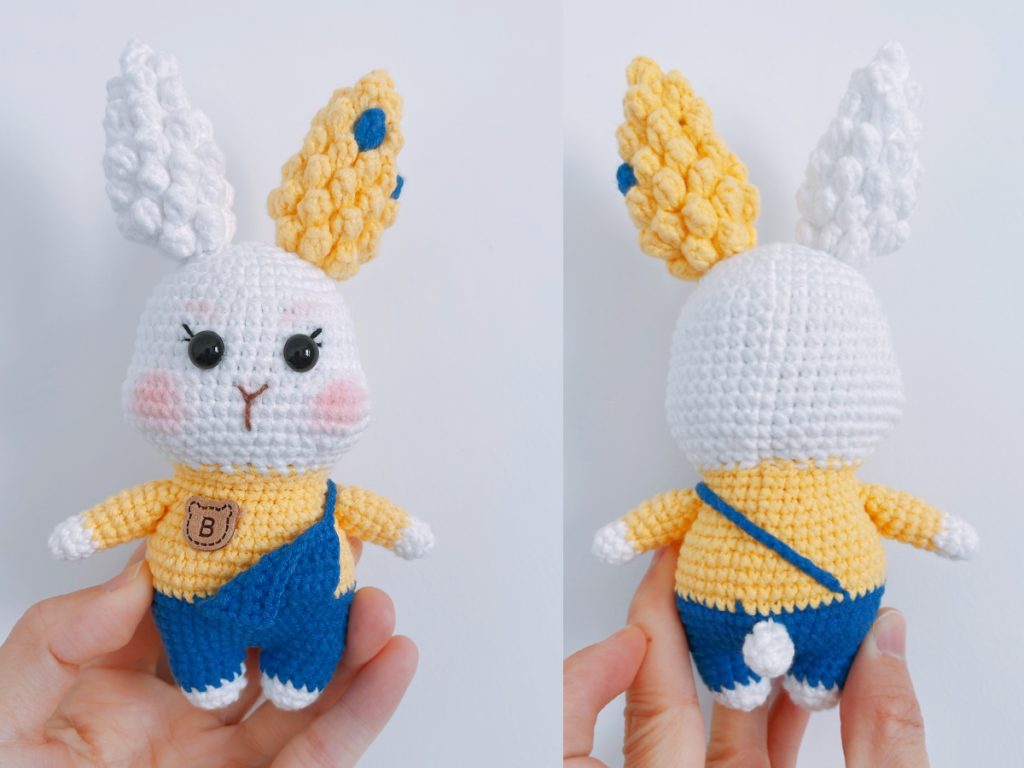
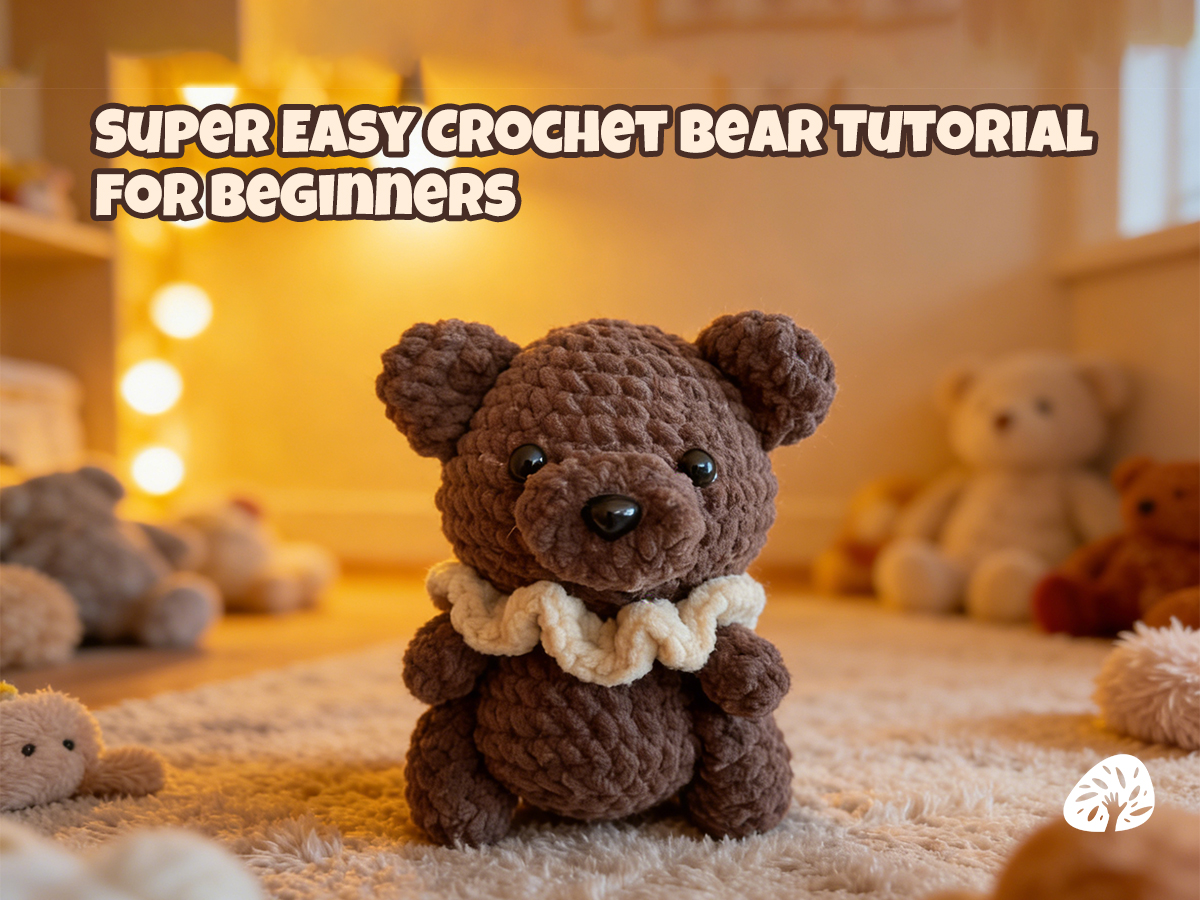
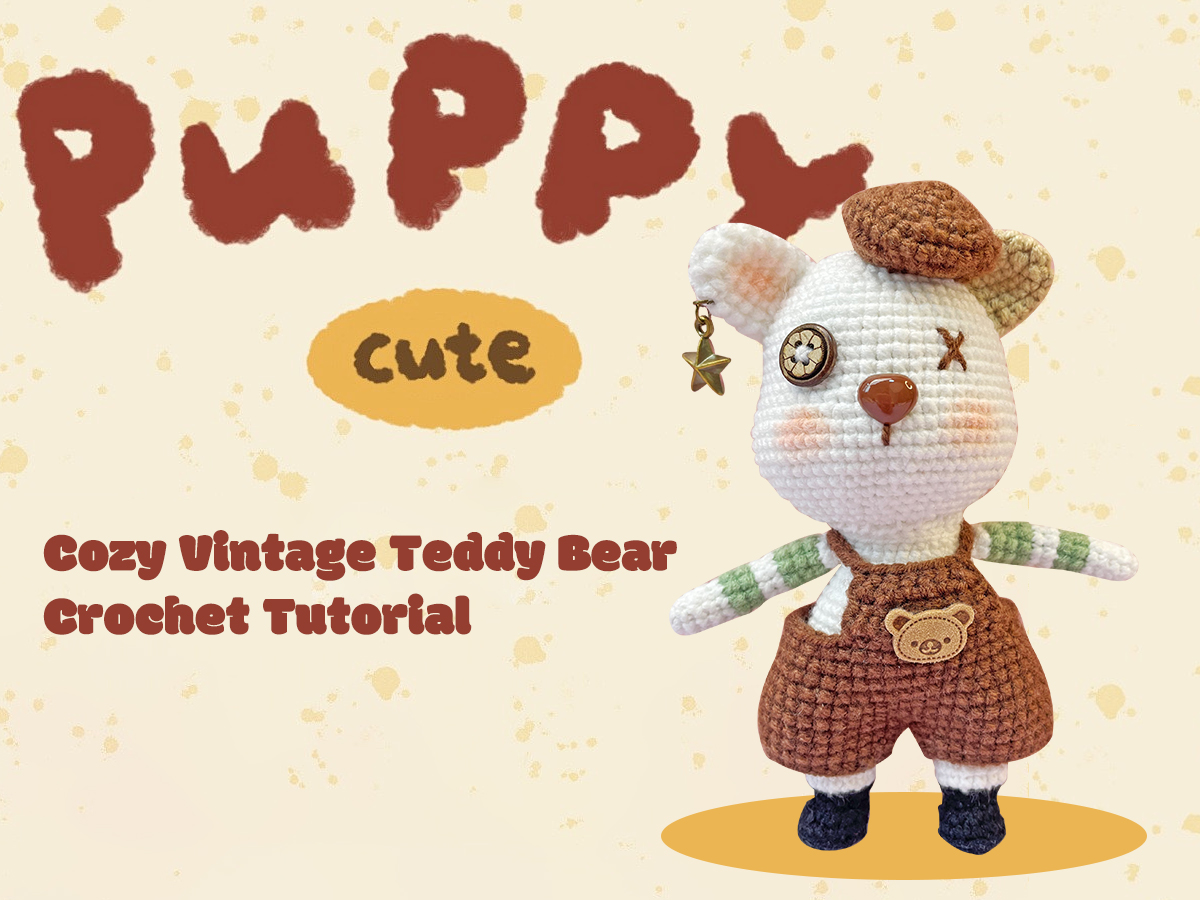
Make a Cozy Huggable Handmade Amigurumi Bunny
Popcorn Stitch Bunny Crochet Tutorial is your go-to guide for creating a soft, huggable amigurumi bunny using the classic popcorn stitch—an easy, fun DIY craft that’s as therapeutic to make as it is to cuddle with! Whether you’re a total crochet beginner picking up a hook for the first time or a seasoned crafter looking for a cozy, quick project, this step-by-step tutorial breaks down every stitch and step to help you make your own adorable popcorn stitch bunny with ease.
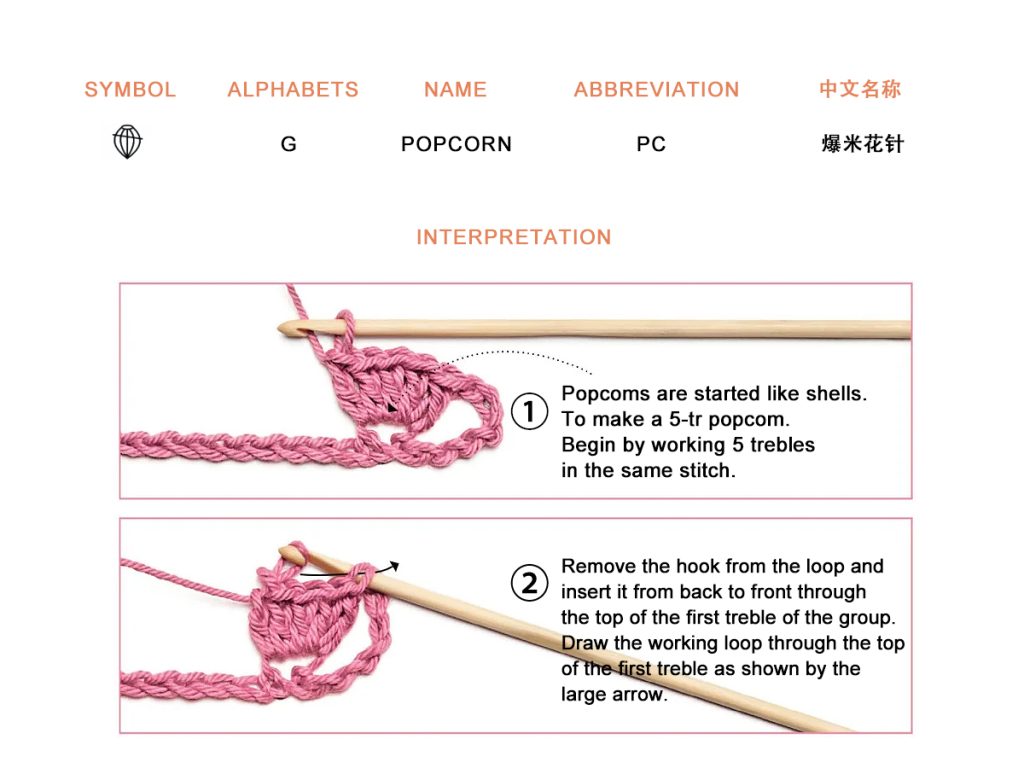
X: sc(single crochet) V: 2 sc into the same stitch A: single crochet decrease number+(): the number of times to loop the stitches in parentheses K: sp(s)(spaces) T: hdc (half double crochet) F: dc (double crochet) E: tr (treble crochet) blo: Through back loops only flo: Through front loops only
At the beginning of each round, make a chain (ch), and at the end of each round, work a slip stitch (sl st). These two stitches do not count toward the total stitch count.
Step 1: Crochet the Popcorn Stitch Bunny’s Head
| Row | Stitch |
| R1 | Magic Ring 8X |
| R2 | 8V |
| R3 | 8 (X, V) |
| R4 | 6 (3X, V) |
| R5 | 6 (2X, V, 2X) |
| R6 | 36X |
| R7 | 6 (5X, V) |
| R8~R12 | 42X |
| R13 | 11X, 6V, 8X, 6V, 11X |
| R14~R16 | 54X |
| R17 | 11X, 6A, 8X, 6A, 11X |
| R18 | 6 (5X, A) |
| R19 | 6 (2X, A, 2X) |
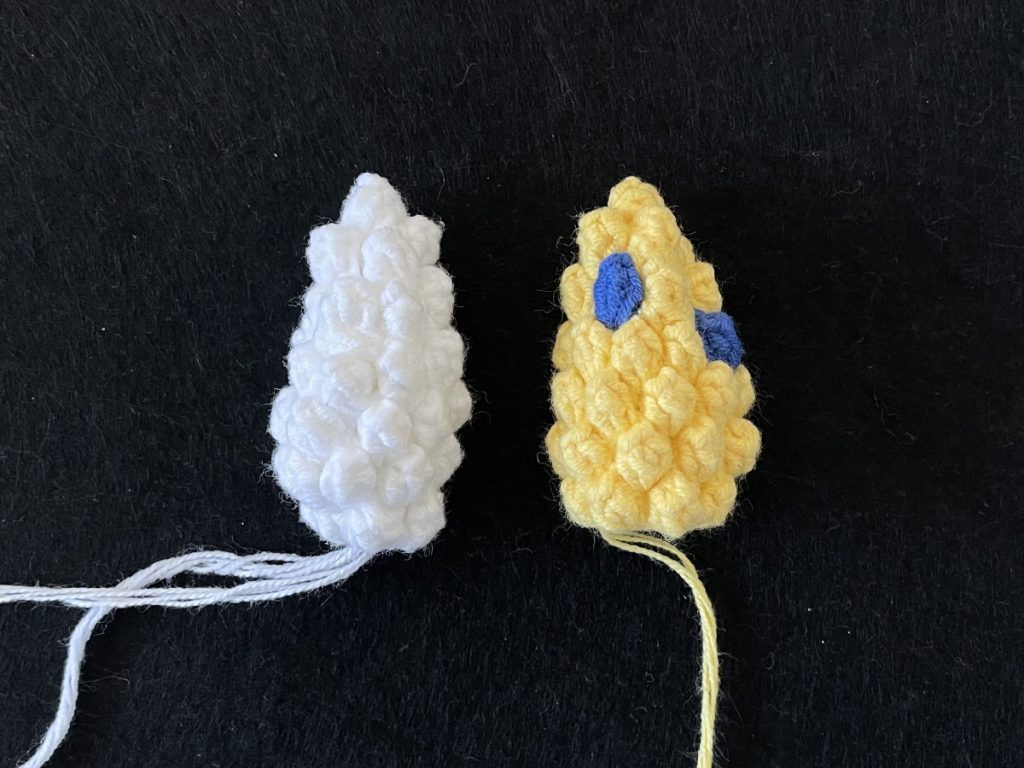
Step 2: Crochet the Popcorn Stitch Bunny’s Ears (Make 2)
| Row | Stitch |
| R1 | Magic Ring 3ch, 6G, SL |
| R2 | 2ch, 2 (2G, GV), SL |
| R3~R4 | 2ch, 8G, SL |
| R5 | 2ch, 2 (2G, GA), SL |
| R6 | 2ch, 2 (G, GA), SL |
| R7 | 2ch, G Slip stitch to finish and leave a long end for sewing |
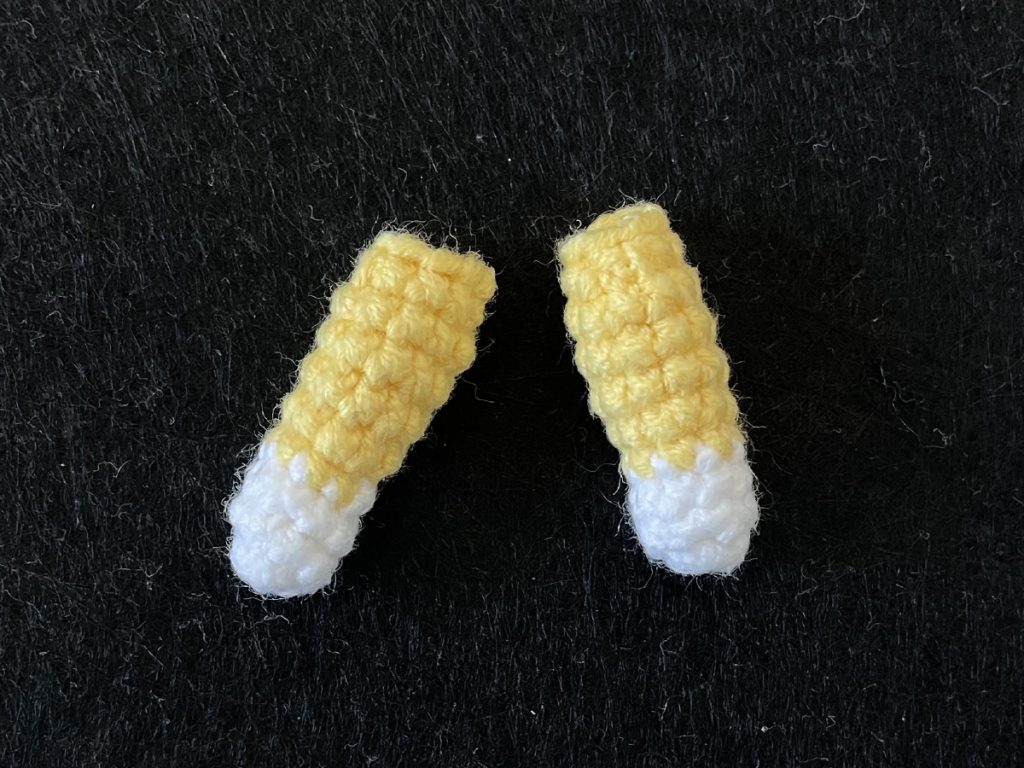
Step 3: Crochet the Popcorn Stitch Bunny’s Arms (Make 2)
| Row | Stitch |
| R1 | Magic Ring 6X |
| R2 | 2 (2X, V) |
| R3~R4 | 8X |
| R5 | 2 (3X, V) |
| R6~R8 | 10X |
| R9 | 2 (3X, A) |
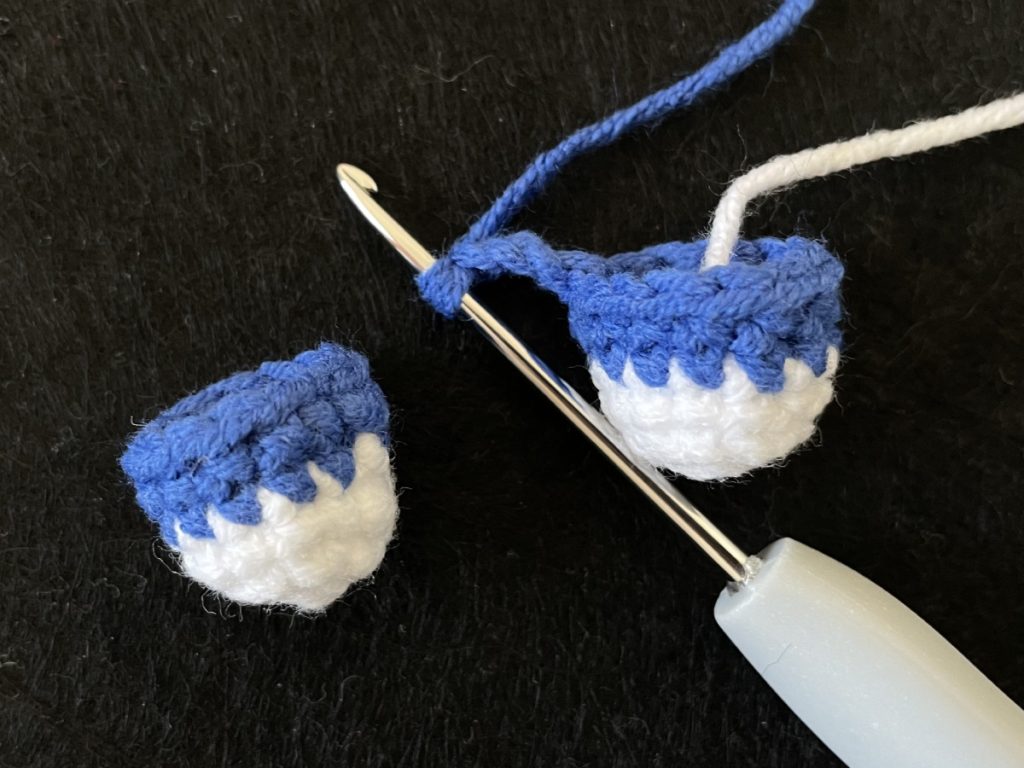
Step 4: Crochet the Popcorn Stitch Bunny’s Body (Incl. Legs)
| Row | Stitch |
| R1 | Magic Ring 6X |
| R2 | 6V |
| R3~R5 | 12X |
| Crochet two penguin legs. Break the thread after finishing the first leg. For the second leg, chain 3 (3ch), then connect the two legs and crochet the body. | |
| R6 | 12X, 3X, 12X, 3X |
| R7 | 6 (2X, V, 2X) |
| R8 | 36X |
| R9 | X, V, 24X, 5 (V, X) |
| R10-R11 | 42X |
| R12 | 6 (3X, V, 3X) Starting from the 15th stitch, crochet 11 inner half stitches (blo 11). |
| R13~R15 | 48X |
| R16 | 6 (3X, A, 3X) |
| R17 | 42X |
| R18 | 6 (5X, A) |
| R19 | 36X |
| R20 | 6 (2X, A, 2X) |
| R21~R22 | 30X leave a long end for sewing |
Step 5: Crochet the Popcorn Stitch Bunny’s Tail
| Row | Stitch |
| R1 | Magic Ring 6X |
| R2 | 6F |
Step 6: Crochet the Popcorn Stitch Bunny’s Suspenders & Overalls Straps
| Suspenders: On the outer half – stitches of the 11 inner half – R12 of the body (single – piece crochet). Crochet 6 rows of single crochet using the outer half – stitches, and finally, make a slip stitch row. |
| The straps of overalls: Make a slip stitch on the 9th stitch counting to the right from the slip – stitch point where the yarn was changed on the body, at the slip – stitch point of the yarn – changing position on the body. |
Final Assembly & Finishing Touches
Once all pieces (head, ears, arms, body, tail, suspenders) are crocheted, it’s time to assemble your popcorn stitch bunny! Use the long yarn tails you left on each piece to sew them together with a tapestry needle—sew the ears to the top of the head, arms to the sides of the body, head to the top of the body, and tail to the back.
For extra coziness, stuff the bunny’s head, body, ears, and arms with polyfill before sewing all pieces closed (use a small stuffing tool for tight spots like the ears and tail!). You can also add facial details—embroider eyes with black yarn, a tiny nose with pink yarn, and whiskers with white yarn—to make your bunny’s face as adorable as you’d like.
#PopcornStitchBunny #CrochetBunny #AmigurumiPattern #CrochetTutorial
#EasyCrochet #BeginnerCrochet #HandmadeBunny #CrochetToys

Leave a Reply