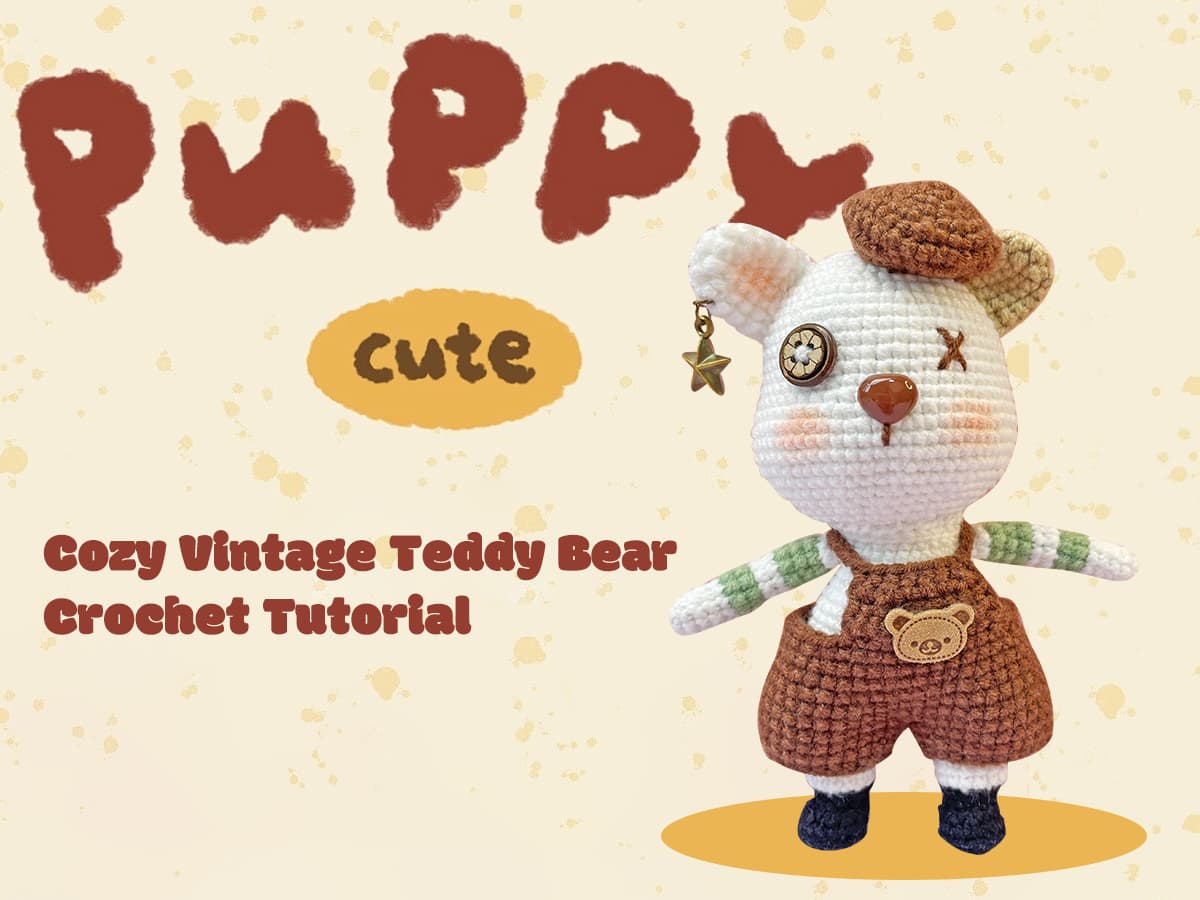
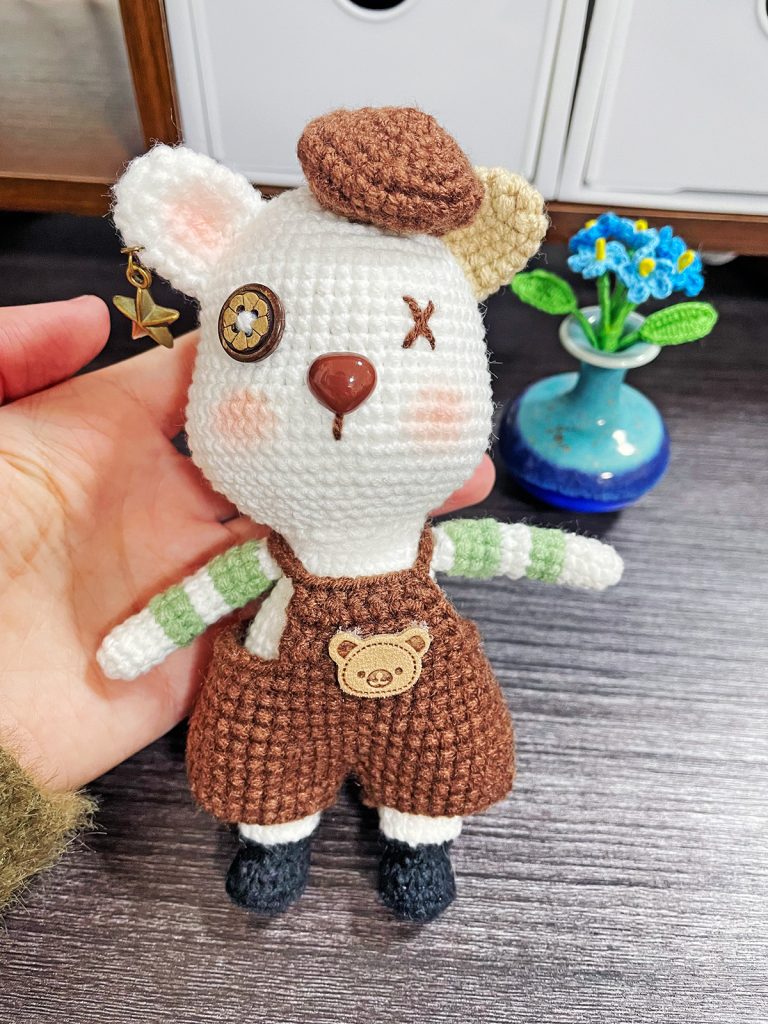
Unwind with our complete step-by-step vintage teddy bear crochet tutorial — every stitch weaves warmth, nostalgia, and gentle healing. Perfect for beginners and experienced crafters alike, this guide helps you make a soft, mid-century inspired plush companion with easy stitches and timeless details.
Crafting your own vintage teddy bear is mindful self-care. With muted vintage-style yarns, a plush texture, and cute handmade details, you’ll create more than a toy — you’ll make a heartfelt keepsake.
X: sc(single crochet) V: 2 sc into the same stitch A: single crochet decrease number+(): the number of times to loop the stitches in parentheses T: hdc (half double crochet) F: dc (double crochet) FV: 2dc into the same stitch blo: Through back loops only flo: Through front loops only M: 3sc (single crochet 3 together) W: 3sc into the same stitch ss,sl,st: ship stitch E: treble crochet
At the beginning of each round, make a chain (ch), and at the end of each round, work a slip stitch (sl st). These two stitches do not count toward the total stitch count.
Tools Needed:
Yarn: 4-ply yarn
Crochet Hook: Size 1.6
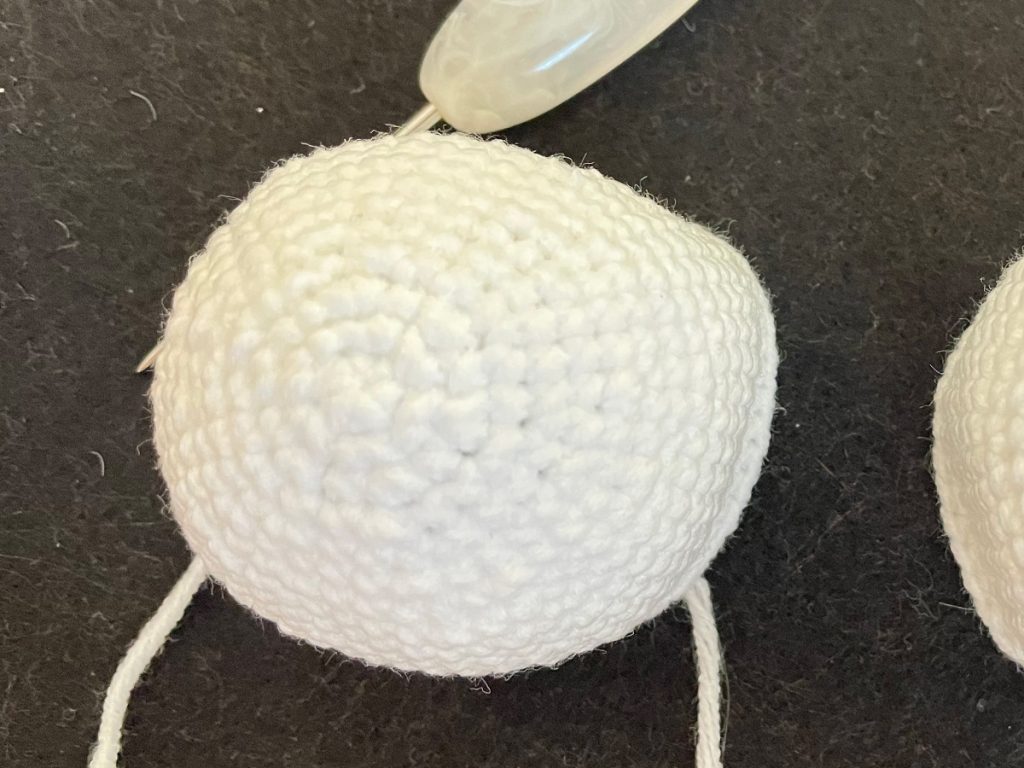
Crochet the bear's head
Row | Stitch | Total stitch |
R1 | Magic Ring 6X | 6 |
R2 | 6V | 12 |
R3 | 6 (X, V) | 18 |
R4 | X, V, 5 (2X, V), X | 24 |
R5 | 6 (3X, V) | 30 |
R6 | 2X, V, 5 (4X, V), 2X | 36 |
R7 | 6 (5X, V) | 42 |
R8 | 3X, V, 5 (6X, V), 3X | 48 |
R9 | 48X | 48 |
R10 | 6 (7X, V) | 54 |
R11~R17 | 54X | 54 |
R18 | 4X, V, 5 (8X, V), 4X | 60 |
R19 | 6 (9X, V) | 66 |
R20~R21 | 66X | 66 |
R22 | 6 (9X, A) | 60 |
R23 | 4X, A, 5(8X, A), 4X | 54 |
R24 | 6 (7X, A) | 48 |
R25 | 3X, A, 5 (6X, A), 3X | 42 |
R26 | 6 (5X, A) | 36 |
R27 | 2X, A, 5 (4X, A), 2X | 30 |
Crochet the bear's arms
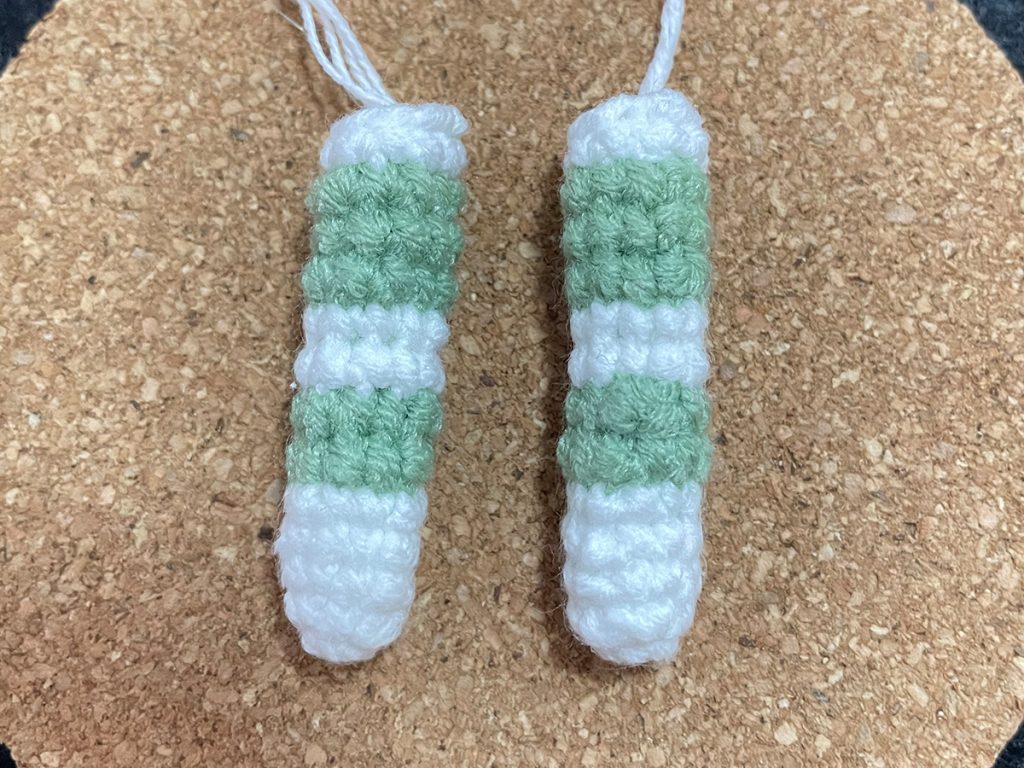
Row | Stitch | Total stitch |
R1 | Magic Ring 6X | 6 |
R2 | 3 (X, V) | 9 |
R3~R13 | 9X | 9 |
Crochet the bear's legs and body
Row | Stitch | Total stitch |
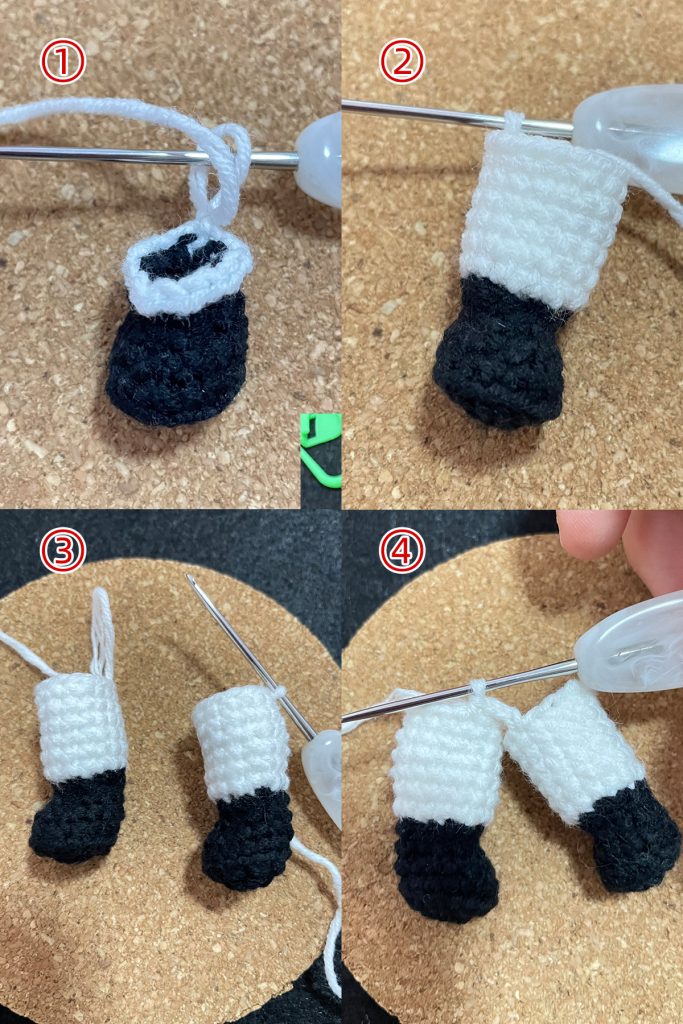
The first leg | ||
R1 | Magic Ring 8X | 8 |
R2 | 8V | 16 |
R3 | blo: 16X | 16 |
R4 | 4X, 4A, 4X | 12 |
R5 | 3X, 3A, 3X | 9 |
Switch to yarn of another color | ||
R6 | blo: X, 6V, 2X | 15 |
R7~R12 | 15X | 15 |
Cut the yarn, then crochet the second leg using the same method. | ||
R13 | Break the yarn at the two legs, then sew the inner mid-sections of the legs together with a strand of yarn. | 42 |
R14~R20 | 42X | 42 |
R21 | 6 (5X, A) | 36 |
R22~R24 | 36X | 36 |
R25 | 6 (4X, A) | 30 |
R26~R27 | 30X | 30 |
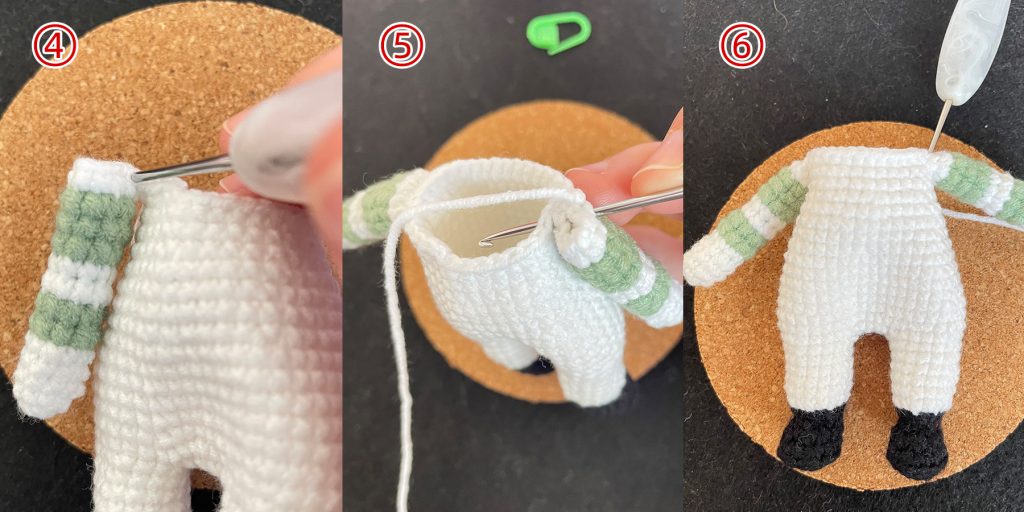
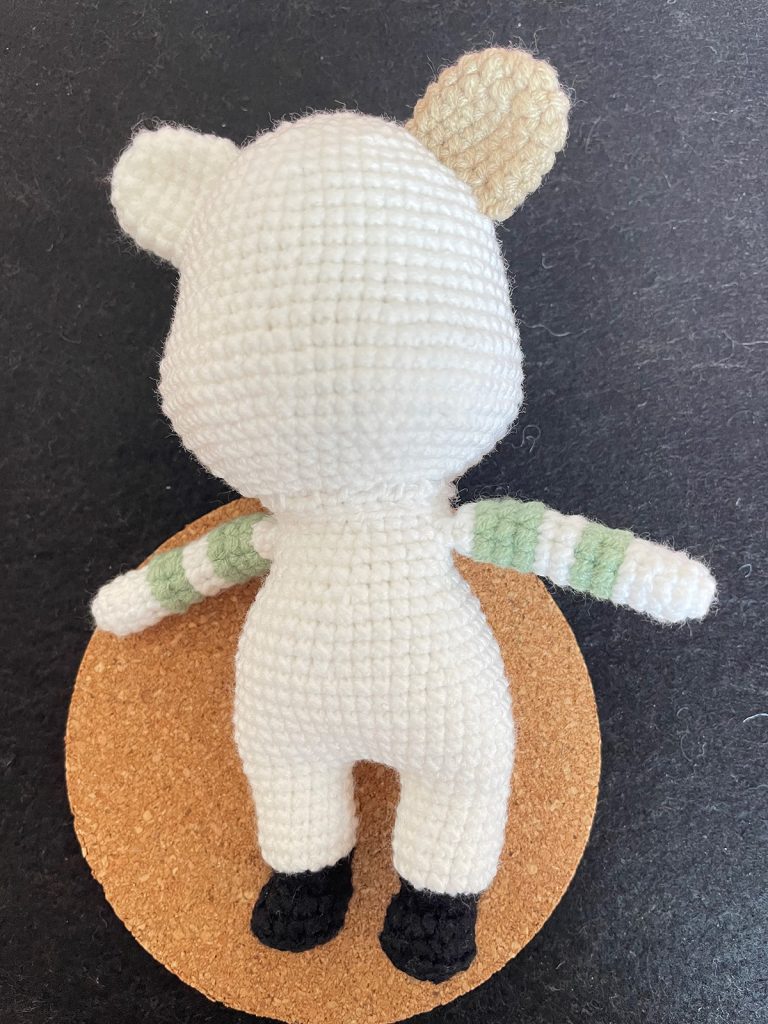
R28 | Crochet the arms onto the body | 30 |
R29 | 6 (3X, A) | 24 |
R30 | blo: 24X | 24 |
Leave a long tail and sew it to the head |
Crochet the bear's ears
Row | Stitch | Total stitch |
R1 | Magic Ring 7X | 7 |
R2 | 7V | 14 |
R3~R6 | 14X | 14 |
Leave a long tail for sewing up |
Crochet the bear's pants
Row | Stitch | Total stitch |
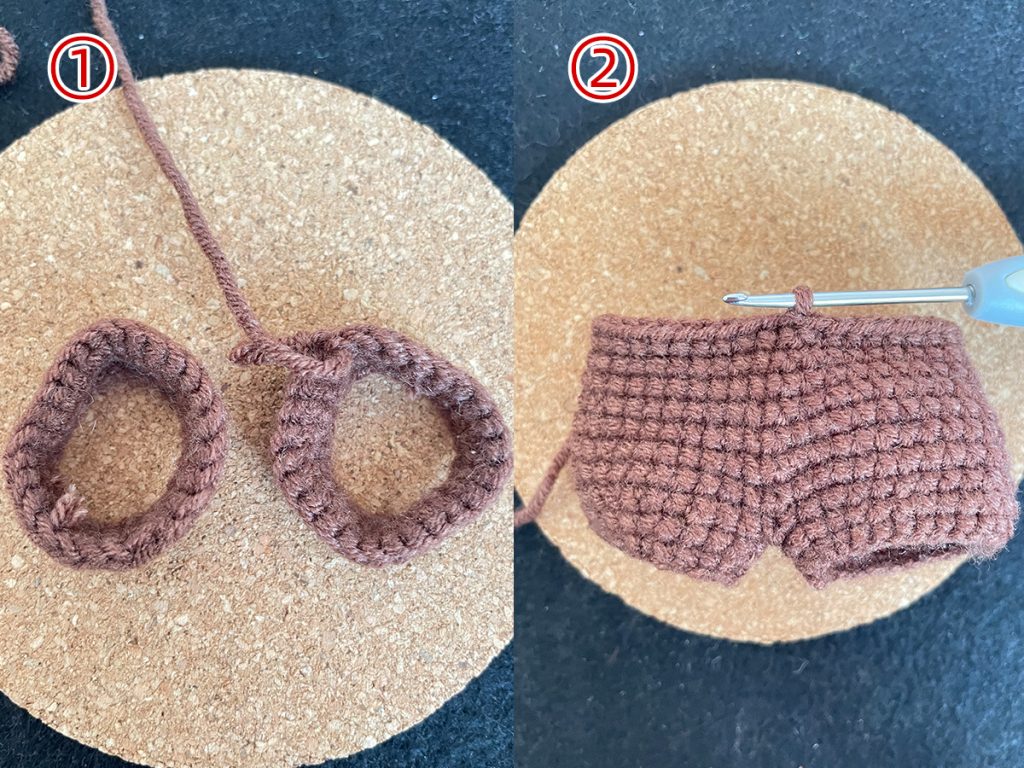
Chain 25 (ch 25), join to form a ring, then work 25 single crochets (sc) for two rounds. | ||
Make two of these. Cut the yarn after the first one; after finishing the second one, join it to the first one. | ||
R3 | 25X, 25X | 50 |
R4~R7 | 50X | 50 |
R8 | 5 (8X, A) | 45 |
R9~R10 | 45X | 45 |
R11 | 3 (13X, A) | 42 |
Pick the middle spot of the pants and work 8 single crochets (sc) there. | ||
Flat crochet | ||
Crochet the straps of the pants with chains (ch) — you can adjust the number of stitches according to your actual needs. |
Crochet the bear's hat
Row | Stitch | Total stitch |
R1 | Magic Ring 6X | 6 |
R2 | 6V | 12 |
R3 | 6 (X, V) | 18 |
R4 | X,V, 5 (2X, V), X | 24 |
R5 | 6 (3X, V) | 30 |
R6 | 2X, V, 5 (4X, V), 2X | 36 |
R7 | 6 (4X, A) | 30 |
R8 | 10 (X, A) | 20 |
CrochetBearPattern #BearAmigurumiTutorial #CrochetStuffedBear #EasyCrochetBear #AmigurumiBearDIY #CuteCrochetBear #VintageCrochetBear #MiniCrochetBear #CrochetBearClothes