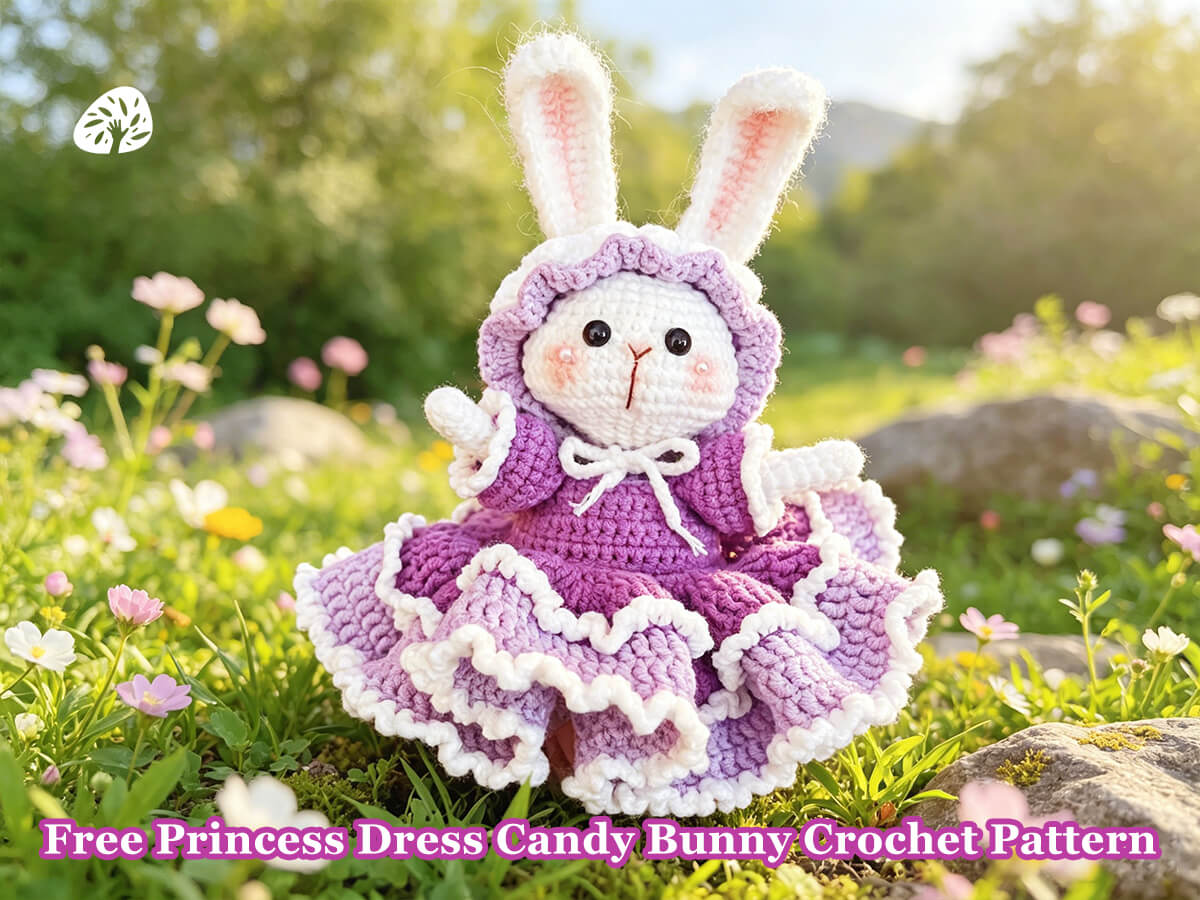
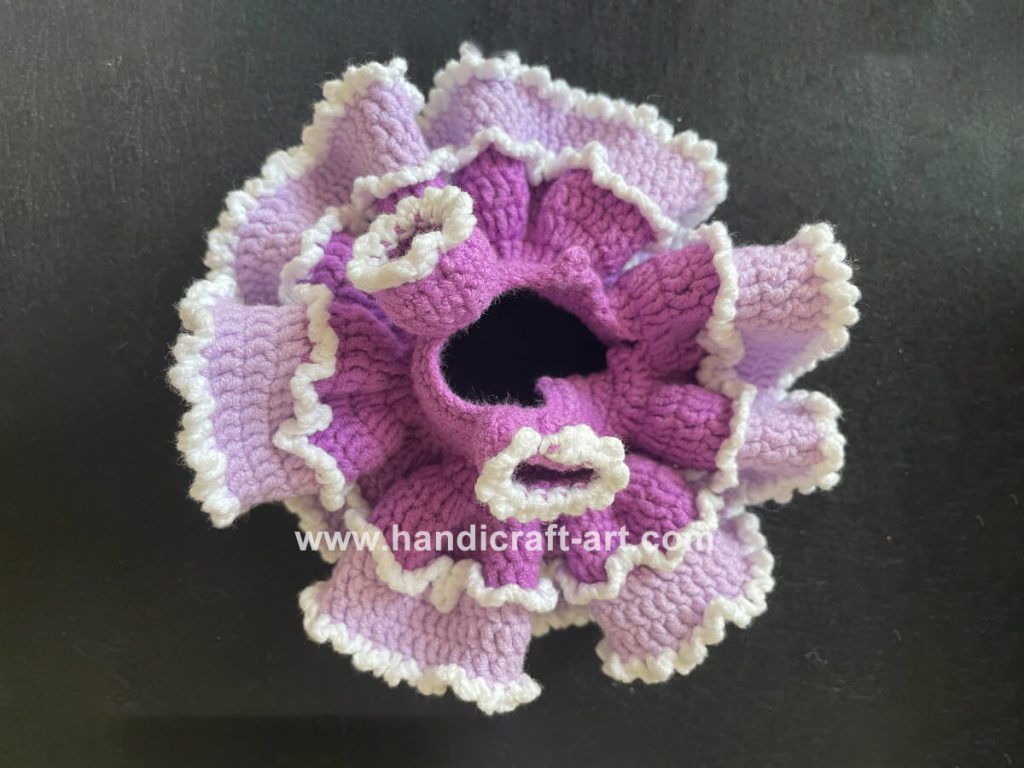
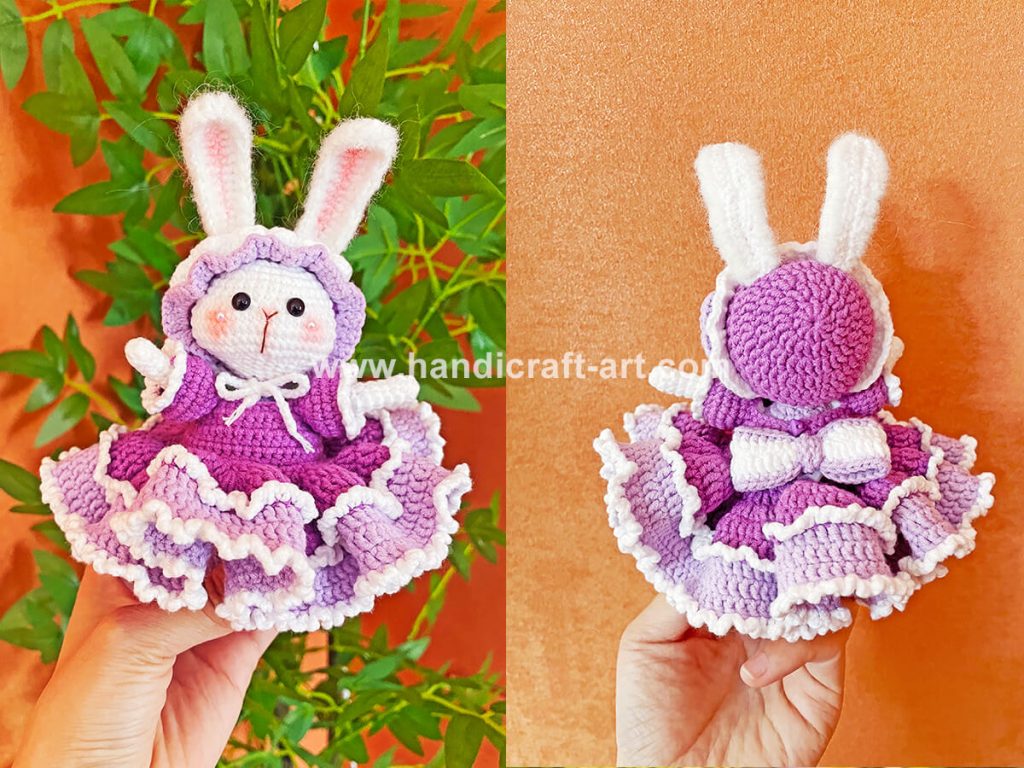
This Candy Bunny crochet pattern brings you the Giant Princess Dress Candy Bunny, a super cute amigurumi design full of sweetness and romance. The bunny features a plump, soft body, long floppy ears, and a delicate embroidered face, paired with an oversized ruffled princess dress that creates a dreamy, fluffy silhouette.
This Candy Bunny crochet pattern includes detailed row-by-row instructions for the head, body, ears, arms, legs, and the extra-large layered princess skirt with beautiful lace edging. Made with soft milk cotton yarn and simple basic stitches, it is friendly for intermediate crocheters and yields a lovely, huggable finished toy. Perfect for handmade gifts, room decor, or your own plush collection, this Candy Bunny will melt hearts with its royal, sweet style.
Stitch Key (Beginner Friendly)
- X = sc (single crochet)
- V = 2 sc in same stitch (increase)
- A = single crochet decrease (sc 2tog)
- M = 3 sc together
- W = 3 sc in same stitch
- T = hdc (half double crochet)
- F = dc (double crochet)
- FV = 2 dc in same stitch
- FW = 3 dc in same stitch
- E = treble crochet
- flo = T hrough front loops only
- blo = Through back loops only
- ch = chain stitch
- sl st = slip stitch
- number+(): the number of times to loop the stitches in parentheses
Note: Start each round with ch, end with sl st. These do not count toward total stitches.
Tools & Materials
- Soft 4-ply yarn
- 2.0 mm crochet hook
- Polyfill stuffing
- Stiff wire
Candy Bunny Crochet Pattern
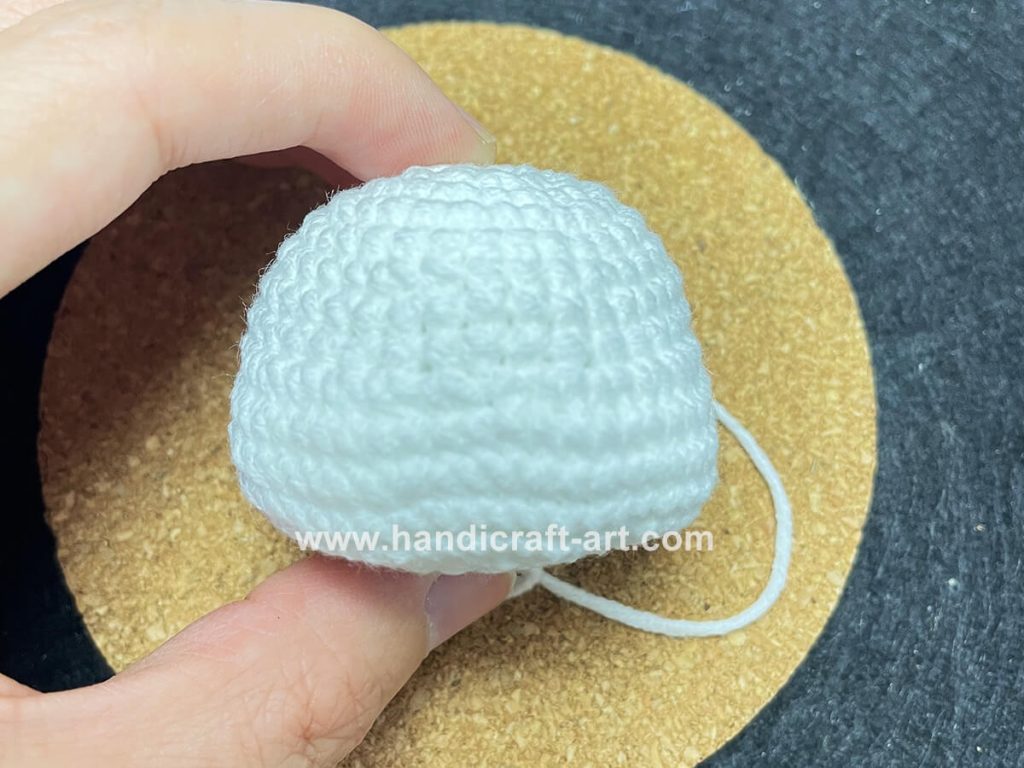
1. Crochet the Head
| Row | Stitch | Total stitch |
| R1 | Magic Ring 8X | 8 |
| R2 | 8V | 16 |
| R3 | 8 (X, V) | 24 |
| R4 | 6 (3X, V) | 30 |
| R5 | 30X | 30 |
| R6 | 6 (2X, V, 2X) | 36 |
| R7~R8 | 36X | 36 |
| R9 | 11X, 6V, A, 6V, 11X | 47 |
| R10~R13 | 47X | 47 |
| R14 | 10X, 6A, M, 6A, 10X | 33 |
| R15 | 3 (9X, A) | 30 |
| R16 | 6 (3X, A) | 24 |
| R17 | 6 (X, A, X) | 18 |
| R18 | 6 (X, A) | 12 |
| Stuff the head firmly with fiberfill. |
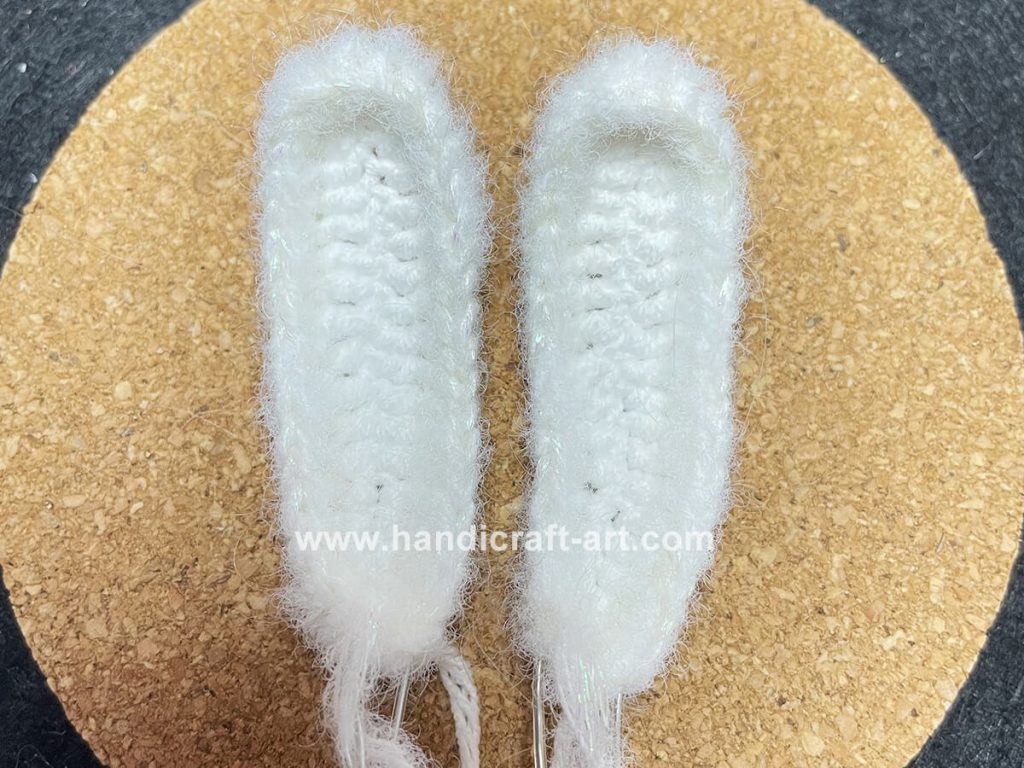
2. Crochet the ears (Make 2)
| Row | Stitch |
| R1 | 19ch, Start crocheting from the 2nd chain from the hook 5X, 4T, 5F,3T, W, 3T, 5F, 4T, 5X |
| R2 | Insert the wire, then work one round of single crochet (sc). |
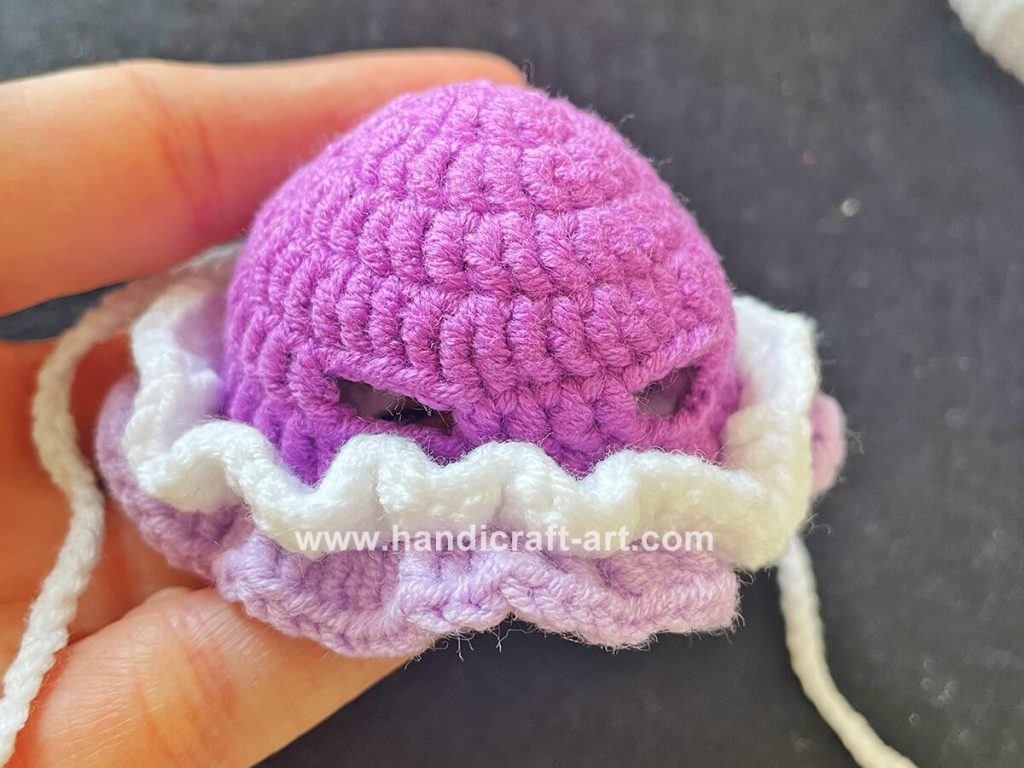
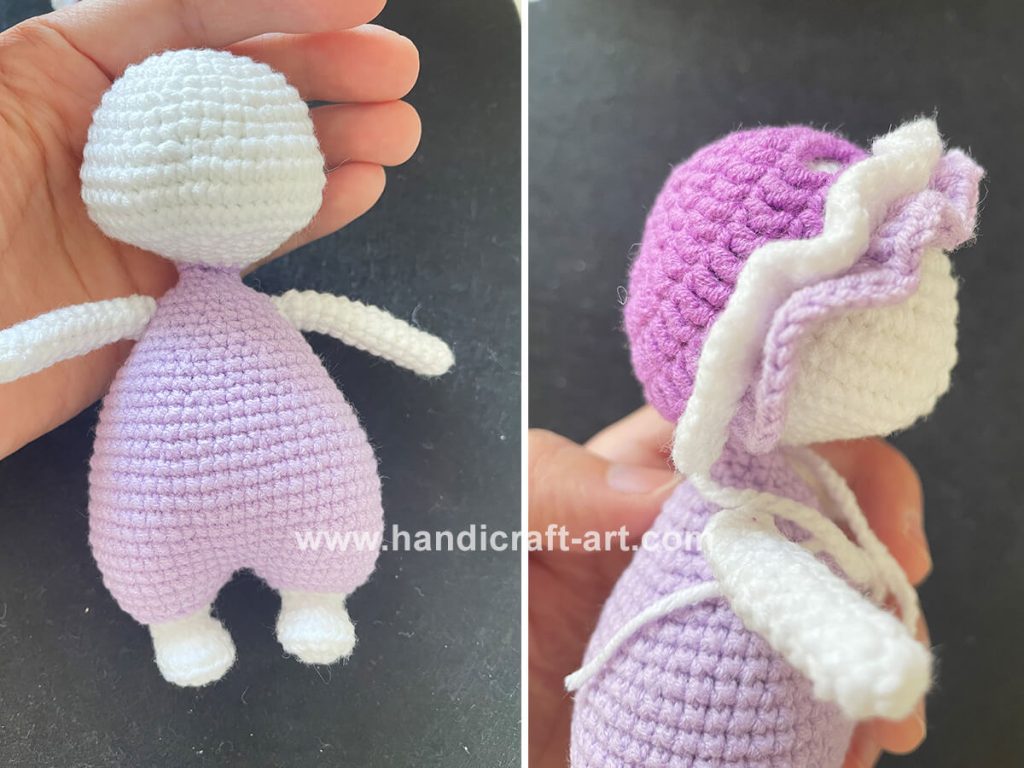
3. Crochet the hat
| Row | Stitch |
| R1 | Magic Ring 10F |
| R2 | 10FV |
| R3 | 10 (F, FV) |
| R4 | 10 (F, FV, F) |
| R5 | 14F, Ch 4, skip 4 sts. 4F, Ch 4, skip 4 sts. 14F |
| R6 | 40F |
| R7 | 5 (6X, A) |
| R8 | 5X, use white yarn. : flo: 25 (3F) <3 dc in each st around, total 25 dc.>, use light purple yarn. blo:25 (3F) 5X |
| R9 | Make 2 chains on each side, 32 ch each. |
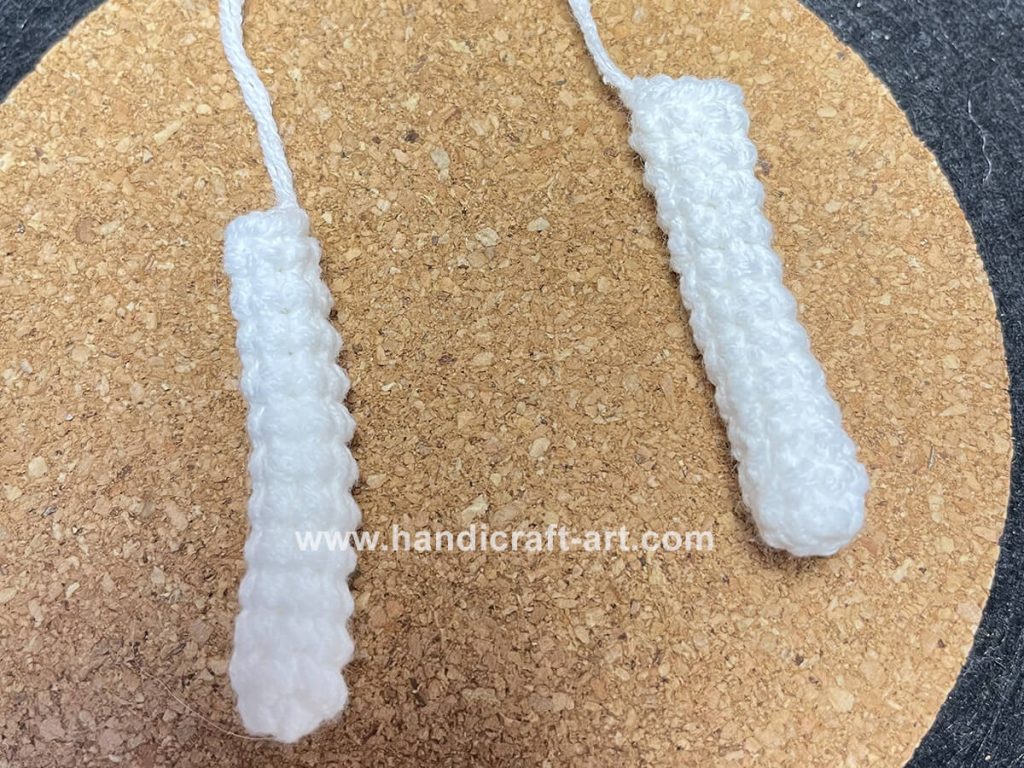
4. Crochet the arms (Make 2)
| Row | Stitch | Total stitch |
| R1 | Magic Ring 7X | 7 |
| R2~R12 | 7X | 7 |
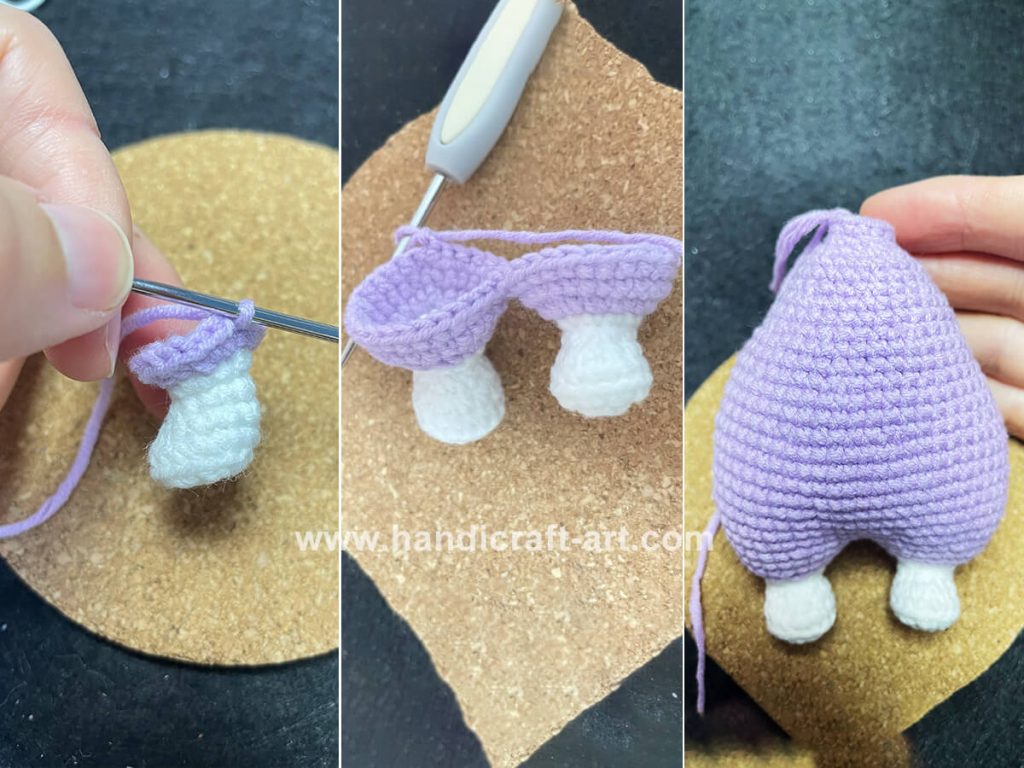
5. Crochet the legs and body
| Row | Stitch | Total stitch |
| R1 | Use white yarn Magic Ring 8X | 8 |
| R2 | 8V | 16 |
| R3 | blo: 16X | 16 |
| R4 | 4X, 4A, 4X | 12 |
| R5 | 3X, 3A, 3X | 9 |
| R6 | Change to light purple yarn. 3 (2X, V) | 12 |
| R7 | 12V | 24 |
| R8 | 24X | 24 |
| Fasten off after completing the first leg. Crochet the second leg following the same stitch pattern. Do not fasten off the second leg. Instead, connect it to the first leg and continue working in rounds. | ||
| R9 | 24X + 24X | 48 |
| R10 | 8 (5X, V) | 56 |
| R11~R18 | 56X | 56 |
| R19 | 8 (5X, A) | 48 |
| R20~R21 | 48X | 48 |
| R22 | 8 (2X, A, 2X) | 40 |
| R23~R24 | 40X | 40 |
| R25 | 8 (3X, A) | 32 |
| R26~R27 | 32X | 32 |
| R28 | 8 (X, A, X) | 24 |
| R29~R30 | 24X | 24 |
| R31 | 8 (X, A) | 16 |
| R32 | 5 (X, A), X | 11 |
| R33 | 11X | 11 |
| Leave long tail for sewing. |
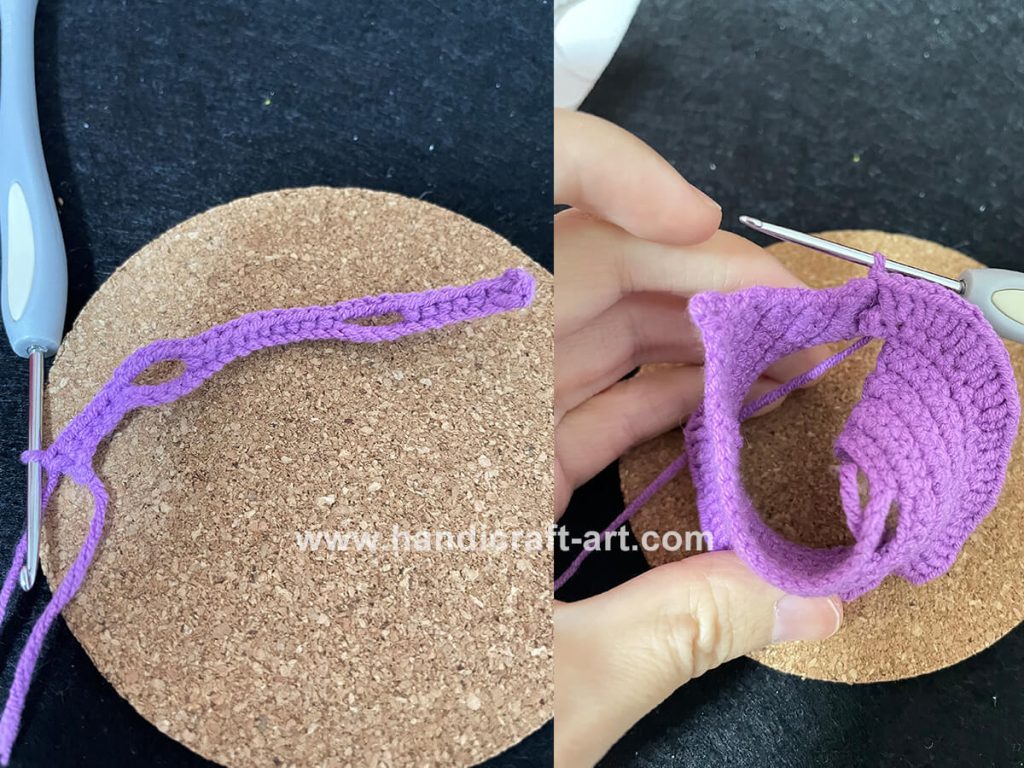
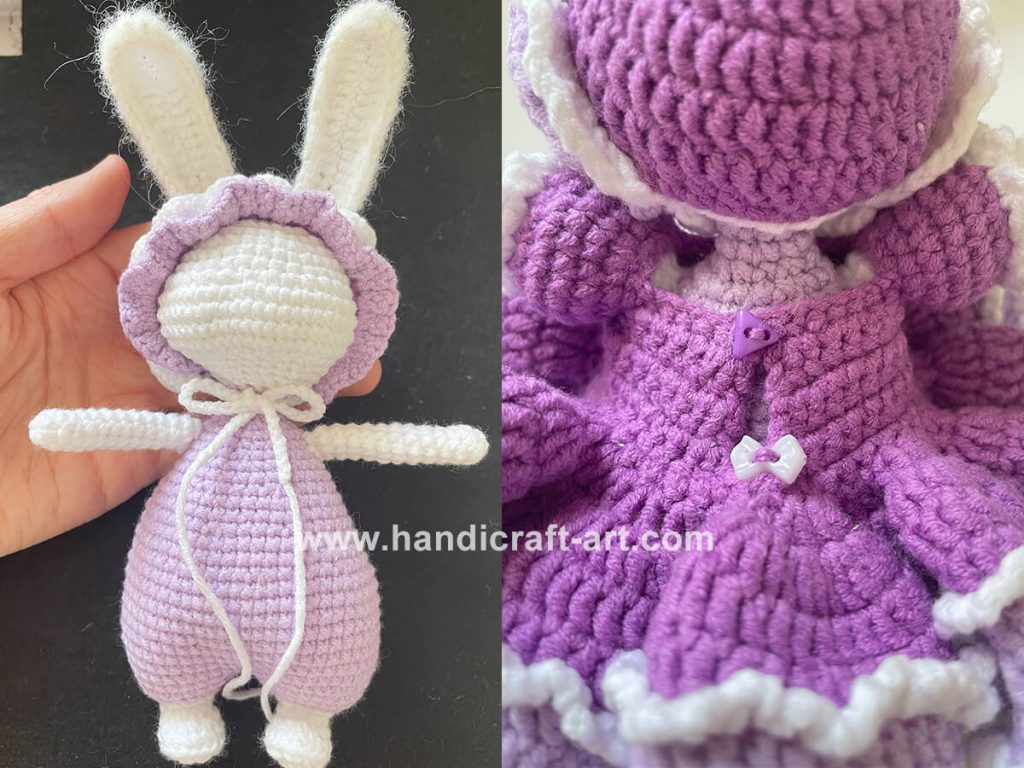
5. Crochet the princess dress.
| Row | Stitch |
| R1 | 38ch |
| R2 | Start crocheting from the 7th stitch from the hook. 6X, 5ch(K5),10X, 5ch(K5),6X < note:5ch(k5): Ch 5, skip 5 sts.> |
| R3 | 1ch, Turn, then continue crocheting. V, 5X, V, 18X, V, 5X, V |
| R4 | 1ch, Turn, then continue crocheting. 36X |
| R5 | 1ch, Turn, then continue crocheting. V, 34X,V |
| R6 | 1ch, Turn, then continue crocheting. 38X |
| R7 | 1ch, Turn, then continue crocheting. V, 36X, V |
| R8 | 1ch, Turn, then continue crocheting. 40X + 5ch |
| R9 | Turn, then continue crocheting. V (Start from the 6th stitch from the hook.), 38X, V |
| R10 | 2ch, Turn, then continue crocheting. 42FV |
| R11 | Join to the first F of R10, then begin crocheting. 84FW |
| R12~R16 | 252F (Change to light purple yarn on Row 14.) |
| R17 | Use white yarn. 4ch, Slip stitch (sl st) in the next stitch. Repeat to the end. |
| You can customize the colors of the skirt (purple and light purple are shown in the sample). |
6. Crochet the sleeves.
| Row | Stitch |
| R1 | Use dark purple yarn. Start from the middle stitch of the 5-ch space on the princess dress, work 12 single crochet (sc). |
| R2 | 6 (X, V) |
| R3 | 6 (X, V ,X) |
| R4~R5 | 24X |
| R6 | 12A |
| R7 | Use white yarn. 12 (X, 3ch, sl) <note: Sc, ch 3, sl st in the same stitch.> |
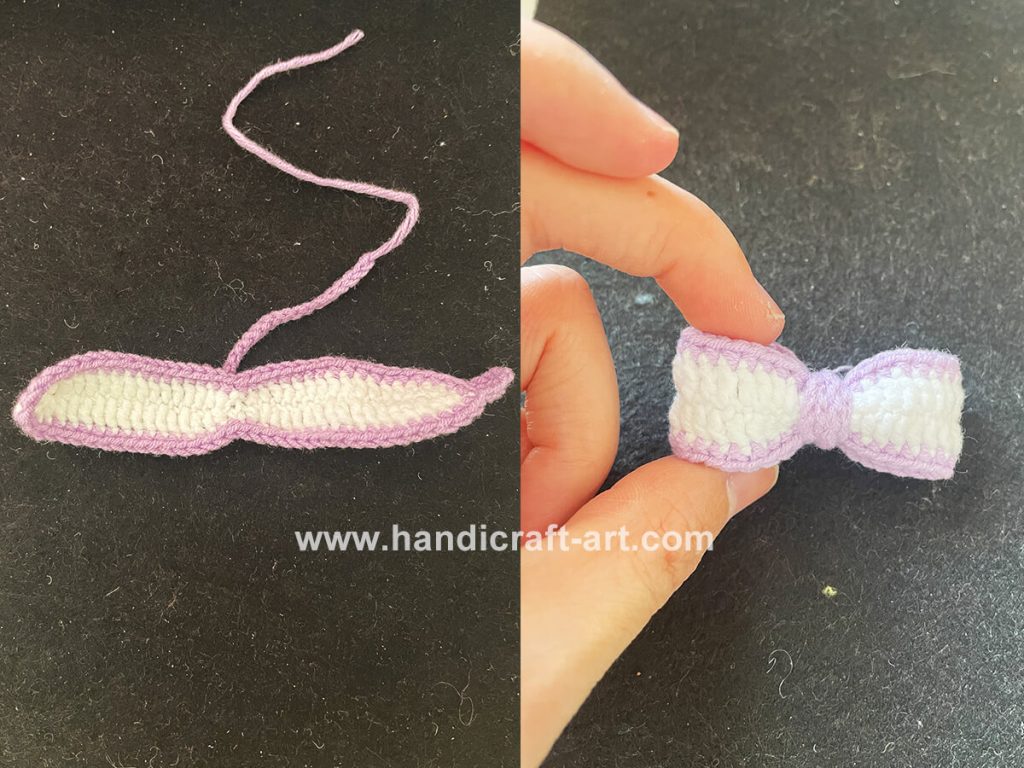
7 . Crochet the bow.
| Row | Stitch |
| R1 | Use white yarn. 37ch, Start crocheting from the 2nd chain from the hook sl, 2T, 12F, 2T, 2sl, 2T, 12F, 2T , (sl,ch,sl), 2T, 12F, 2T, 2sl, 2T, 12F, 2T, sl <note:(sl,ch,sl) in the same stitch.> |
| R2 | Use light purple yarn. Work one round of single crochet (sc). At the end, ch 50. Fold the piece into a bow shape and sew it onto the princess dress. |
8. Assembly complete.
#crochetbunny #freeamigurumipattern #princessdressbunny #candybunny #crochetpatternfree #amigurumitutorial #crochetgiftidea


Leave a Reply